
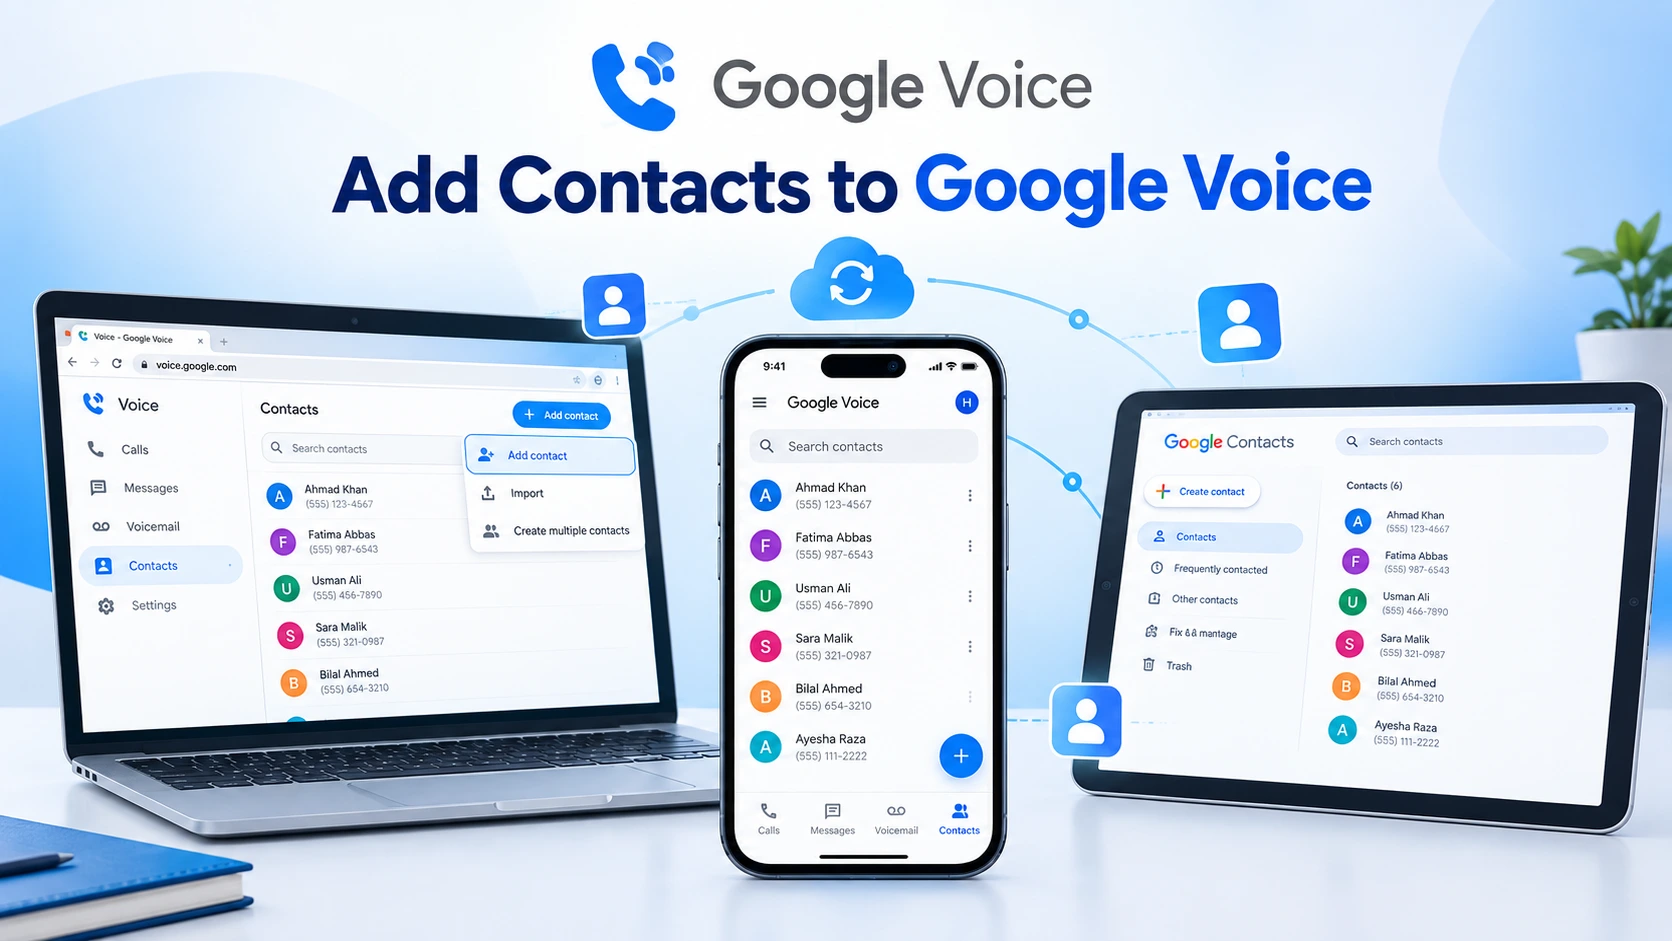
I’ve been using Google Voice for years, and the number one question I see people ask is this exact one. How do you actually add contacts so that you see names instead of just phone numbers?
The answer isn’t complicated. But there’s one thing you need to understand first, or the steps won’t make sense and you’ll end up frustrated when contacts don’t appear where you expect them.
Google Voice handles contacts differently than your regular phone app. And if you’re on iPhone, it works completely differently than it does on Android. Most guides skip over this part and jump straight to the steps. Then people follow those steps, nothing works, and they assume something’s broken.
So I’m going to do this differently.
I’ll explain how the system actually works first. Then I’ll give you the exact steps for your device. Android users have one path. iPhone users have a different path with some real limitations you need to know about upfront. Desktop users have the most reliable path of all.
And if you’ve already tried adding a contact and it didn’t show up, I’ll walk you through exactly why that happens and how to fix it.
Let’s start with the one thing that changes everything.
Google Voice Doesn’t Store Contacts on Its Own — Here’s What You Need to Know First
Before I walk you through any steps, there’s one thing about Google Voice that trips up almost everyone at first.
Google Voice doesn’t actually store contacts.
I know that sounds strange. The app has a Contacts tab right there at the bottom. But here’s what’s actually happening. Google Voice pulls every contact from Google Contacts. It reads that list. It doesn’t create its own separate one.
And this explains why the steps are different on different devices.
On Android, when you add a contact in the Google Voice app, it saves back to your Google account automatically. The sync works both ways. On iPhone, it doesn’t work that way at all. And on desktop, you’re working with Google Contacts directly through the web.
So when someone tells you to “add a contact in Google Voice,” what they really mean is add it to Google Contacts so that Google Voice can see it.
Here’s why this actually matters more than you’d think.
Google Voice doesn’t use carrier caller ID. Your regular phone service shows you the name of a caller even if you haven’t saved them, because your carrier looks it up. Google Voice doesn’t do that. If a number isn’t saved in your Google Contacts, you’ll only see the phone number. No name. Ever.
That’s why getting contacts set up correctly isn’t optional. Without them, your Google Voice call history and message threads are just a wall of raw phone numbers.
One Reddit user put it perfectly: “Google Voice uses the same Google Contacts service as Gmail.” That’s the system. Everything flows through that one central contact list tied to your Google account.
The “Contacts” tab you see in the Google Voice app? That’s showing you contacts from your phone. Not a separate Google Voice contact list. On Android, those phone contacts sync with your Google account. On iPhone, they might not. And that’s where most of the confusion starts.
Once you understand that, the rest of this makes a lot more sense.
If you want to dive deeper into how Google manages your contact data across all its services, Google’s official Contacts Help Center explains exactly how contact syncing works between Gmail, Google Voice, Android devices, and other Google apps. The documentation there covers everything from basic contact management to advanced features like merging duplicates and organizing with labels. I reference it regularly when I run into sync issues or need to verify how a feature is supposed to work, especially since Google updates these features periodically and the official help center stays current with those changes.
How to Add Contacts to Google Voice on Android (Including Samsung)
Android is the easiest platform for this. The sync between the Google Voice app and Google Contacts works reliably in both directions.
Here’s exactly what to do.
Step 1: Open the Google Voice app on your Android phone.
Step 2: Tap the Contacts icon at the bottom of the screen. It’s in the bottom navigation bar alongside Calls, Messages, and Voicemail.
Step 3: At the top of the Contacts screen, tap Add new contact. It’s usually a plus sign or a button that says “Add new contact” depending on your app version.
Step 4: Fill in the contact’s name and phone number. You can add other details like email address or a label if you want, but name and number are the two that matter for Google Voice.
Step 5: Before you tap Save, look at the account selector. This is the step most people miss.
Make sure the contact is saving to your Google account, not to a “Phone” account or “SIM card” account. If you see a dropdown or account name at the top of the contact form, check it. If it says anything other than your Google account email address, tap it and switch to your Google account.
Step 6: Tap Save or the checkmark icon.
The contact should appear in your Google Voice contacts within a few seconds. Sometimes it takes a minute. That’s normal.
Samsung devices follow the exact same steps. Galaxy phones, Galaxy Note, any Samsung Android phone works the same way.
One Thing to Check Before You Tap Save
This is the part that causes most of the “my contact didn’t save” problems on Android.
When you create a new contact, Android gives you the option to save it to different places. Your Google account. Your phone’s local storage. Your SIM card. Sometimes even a Samsung account if you have one set up.
Only contacts saved to your Google account will show up in Google Voice.
If you save a contact to “Phone” or “Device,” it stays on that phone. Google Voice won’t see it. Google Contacts on the web won’t see it. And when you search for that contact in Google Voice, nothing will come up.
So before you tap Save, check that account selector. Make sure it says your Gmail address. If you’re not sure, tap it and look at the options. Choose the one that’s your Google account email.
After you save the contact, do this quick check. Search for the contact name in the Google Voice app. If it shows up, you’re good. If it doesn’t appear after a minute or two, the contact probably saved to the wrong account and you’ll need to add it again.
That one step prevents almost every sync problem on Android.
How to Add Contacts to Google Voice on iPhone — and What Won’t Work
If you’re on iPhone and the steps you’ve tried haven’t worked, this section explains why.
I’m going to be direct about this upfront. iPhone handles Google Voice contacts differently than Android does. And most guides don’t mention this at all, which is why so many iPhone users end up frustrated.
Here’s the limitation you need to know right now.
iPhone address books cannot sync with Google Contacts when you’re using Google Voice. This isn’t a bug. It’s not something Apple or Google is planning to fix. It’s a platform-level design difference between how iOS and Android handle contact syncing.
Google’s own support documentation confirms this. The iPhone and iPad address book sync does not work with Google Voice the same way it works on Android.
So what does that mean for you?
It means when you add a contact in the Google Voice app on your iPhone, that contact will not sync back to your iPhone’s main contacts app. And edits you make to a Google Voice contact on your iPhone will not update anywhere else.
Now here’s what does work.
You can still add contacts in the Google Voice app on iPhone. Those contacts will save to Google Contacts on the web. They just won’t appear in your iPhone’s native contacts app unless you have Google Contacts set to sync with iOS, which is a separate setting I’ll explain in a second.
Here are the steps that actually work on iPhone.
Step 1: Open the Google Voice app on your iPhone.
Step 2: Tap the Contacts icon at the bottom of the screen.
Step 3: Tap Add new contact at the top.
Step 4: Fill in the contact’s name and phone number.
Step 5: Tap Save or Done.
The contact saves to Google Contacts. It will show up in the Google Voice app. But it will not automatically show up in your iPhone’s main contacts unless you’ve enabled Google Contacts sync in your iPhone settings.
And here’s the part that catches people off guard.
If you edit that contact later in the Google Voice app, the changes will not sync back to your iPhone contacts. The iPhone address book and Google Voice contacts stay separate on iOS. They don’t sync the way they do on Android.
If you need to make changes to a contact, the safest place to do it is in Google Contacts on the web at contacts.google.com. Changes made there will sync to Google Voice reliably.
Want to Keep Google Voice Contacts Off Your iPhone? Here’s the Trade-Off
I saw this exact question on Reddit recently. Someone running a small business wanted to save Google Voice callers with notes and categories, but they wanted to keep those contacts separate from their personal iPhone contacts.
Here’s the trade-off.
If you have Google Contacts synced to your iPhone (which you set up in Settings → Contacts → Accounts → Google → toggle Contacts on), then every contact you add to Google Contacts will appear in your iPhone contacts app alongside your personal contacts. Business and personal get mixed together.
If you turn off that sync, Google Voice contacts stay separate. They won’t clutter your iPhone contacts. But you lose some convenience. You won’t be able to dial those contacts from your iPhone’s phone app directly. You’ll need to use the Google Voice app to call them.
Most people keep the sync on and just accept that Google Voice contacts will appear alongside everything else. But if you want them separate, you can turn off Google Contacts sync on your iPhone and manage Google Voice contacts only through the Voice app or through contacts.google.com on a computer.
Neither option is wrong. It’s just a choice you need to make based on how you use your phone.
How to Add Contacts to Google Voice on a Computer
Desktop is actually the most reliable way to add contacts to Google Voice. You’re working directly with Google Contacts through the web, so there’s no app sync to worry about.
There are two methods, and which one you use depends on whether you’re saving a number from a recent call or creating a brand new contact from scratch.
Method 1: Save a Contact from a Recent Call or Message
This is what you do when someone just called or texted you and you want to save their number.
Step 1: Go to voice.google.com in your web browser. Make sure you’re logged into the Google account that has your Google Voice number.
Step 2: Click the Calls tab on the left sidebar. You’ll see your call history.
Step 3: Find the phone number you want to save and click on it. The call or message details will open in the middle panel.
Step 4: In the top right corner of that details panel, click the three vertical dots icon. That’s the menu button.
Step 5: Select People from the dropdown menu.
Step 6: Click the add contact icon. It usually looks like a person silhouette with a plus sign.
Step 7: Enter the contact’s name and any other details you want to save.
Step 8: Click Add.
The contact saves to Google Contacts immediately. It will show up in Google Voice on all your devices once sync completes, which usually takes a few seconds to a minute.
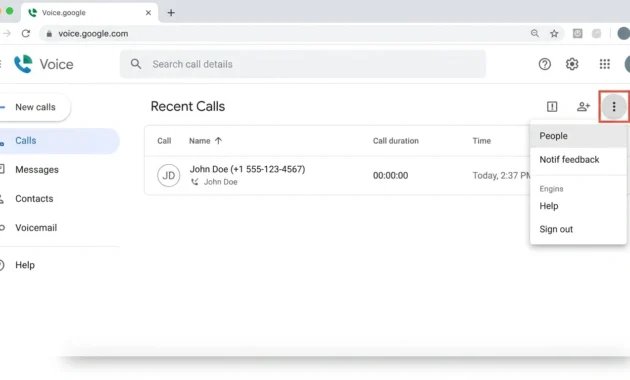
People to add the contact.
Method 2: Create a Brand New Contact from Scratch
This is what you do when you want to add someone before you’ve ever called them.
Step 1: Go to contacts.google.com in your web browser.
Step 2: Make sure you’re logged into the same Google account as your Google Voice number.
Step 3: Click Create contact. It’s usually a button with a plus sign or the words “Create contact” in the top left.
Step 4: Choose Create a contact (for a single person).
Step 5: Enter the contact’s name and phone number. Add any other information you want.
Step 6: Click Save.
That contact is now in Google Contacts, which means Google Voice will see it automatically. No separate import step needed.
From the Voice Website vs. From Google Contacts — Which Should You Use?
Use voice.google.com (Method 1) when you want to save a number from a recent call or message. It’s faster because you’re already looking at the number right there in your call history.
Use contacts.google.com (Method 2) when you’re adding someone you haven’t called yet. Maybe you’re setting up your contacts before you start using Google Voice, or someone gave you their number and you want to save it before you call them.
Both methods save to the same place. Google Contacts is the single source. So no matter which path you take, the contact ends up in the same contact list and shows up in Google Voice the same way.
One small thing to keep in mind. Contacts added on desktop are in Google Contacts, which means they sync to Android automatically. On iPhone, they’ll appear in Google Voice but may not appear in your iPhone contacts app unless you have Google Contacts sync enabled in your iPhone settings like I mentioned earlier.
The sync delay is usually very brief. Most of the time, a contact I add on desktop shows up on my phone within 30 to 45 seconds. Sometimes it takes a minute or two. If it’s been longer than that, check your sync settings.
How to Save a Contact from a Text Message or Recent Call in Google Voice
This is one of the most common scenarios. Someone texts you or calls you, and you want to save their number right then.
And this is where a lot of people hit a problem they weren’t expecting.
If you’re looking for a “save contact” button inside the Google Voice mobile app when you’re reading a text message, you won’t find it. That button used to exist. It doesn’t anymore.
The feature was removed from the mobile app.
I know that’s frustrating, especially if you remember it being there before or if you’ve seen older guides that show screenshots of it. But the current version of the Google Voice mobile app does not have a built-in way to save a contact directly from a text message thread.
Here’s what you do instead.
Saving a Contact from a Text Message (Current Method)
You need to use the web interface for this now.
Step 1: Open a web browser on your computer or phone and go to voice.google.com/messages.
Step 2: Log in if you’re not already logged in.
Step 3: Find the text message thread with the number you want to save.
Step 4: Click on that thread to open it.
Step 5: Click the three dots icon at the top of the message thread.
Step 6: Select People from the menu.
Step 7: Click the add contact icon, enter the person’s name, and click Add.
That’s the current working method as of 2025. It’s not as convenient as doing it from the app, but it works reliably.
Saving a Contact from Your Call History
This one still works in the mobile app on Android and on the web.
On the web:
Go to voice.google.com, click the Calls tab, select the number, click the three dots in the top right, select People, and add the contact. I covered this in the desktop section above.
On Android:
Open the Google Voice app, tap Calls at the bottom, tap the number you want to save, tap the three dots, tap People, and add the contact.
On iPhone:
The most reliable way is to use the web method. The iOS app doesn’t always show the same People menu option consistently, so I’ve found it’s faster to just use voice.google.com on a browser.
The key thing to understand is this. The “save from a text message” button that used to be in the mobile app is gone. That’s not a bug on your phone. Google removed it. The web interface is now the correct path for saving contacts from text messages.
And if you’re seeing guides that tell you to tap a button inside the app’s message thread to save a contact, those guides are outdated. They’re describing an old version of the app that doesn’t match what you’re looking at now.
Need to Add a Lot of Contacts at Once? Use CSV Import Through Google Contacts
If you’re setting up Google Voice with an existing contact list from another phone system or email platform, you don’t want to add contacts one by one. That would take forever.
Google Voice doesn’t have a built-in import button. But you can import contacts in bulk through Google Contacts, and those contacts will sync to Google Voice automatically.
Here’s how to do it.
Step 1: Prepare your contact list as a CSV file or vCard file. Most contact management systems and phone platforms let you export contacts in one of these formats. CSV is more common.
Step 2: Go to contacts.google.com in your web browser.
Step 3: Log in to the Google account that’s connected to your Google Voice number.
Step 4: Click Import in the left-hand menu.
Step 5: Click Select file and choose your CSV or vCard file from your computer.
Step 6: Click Import.
Google Contacts will process the file and add all the contacts to your account. Depending on how many contacts you’re importing, this can take anywhere from a few seconds to a couple of minutes.
Once the import finishes, those contacts will sync to Google Voice automatically. You should see them in the Google Voice app on your phone and on the web within a minute or two.
A couple of things to keep in mind.
Your CSV file needs to be formatted correctly. The first row should have column headers like “Name” and “Phone Number.” Google Contacts will try to map those columns automatically, but you might need to adjust the mapping manually if your file uses different header names.
If you’re importing from another Google account, you can export from one and import to the other. Go to contacts.google.com on the old account, select the contacts you want to export, click the three dots, choose Export, and save the file. Then import that file into your new account using the steps above.
Once the contacts are in Google Contacts, they’re automatically available in Google Voice. There’s no separate sync step you need to trigger.
Why Won’t Google Voice Let You Add Contacts? Fix These First
If you tried adding a contact and it’s not showing up in Google Voice, one of four things is usually the problem.
Let me walk you through the most common causes and how to fix each one.
Problem 1: You Saved the Contact to Your Phone Account Instead of Your Google Account
This is the number one reason contacts don’t appear in Google Voice, especially on Android.
When you create a contact on your phone, Android asks where you want to save it. Your Google account. Your phone’s local storage. Your SIM card. Maybe a Samsung account if you have a Galaxy phone.
Only contacts saved to your Google account will sync with Google Voice.
The fix: Go back to the contact you just added. Open it and check which account it’s saved under. If it says “Phone” or “Device” or anything other than your Gmail address, you need to move it or recreate it.
The easiest way is to delete that contact and add it again, making sure to select your Google account before you save. On some Android phones, you can also edit the contact and change which account it’s saved to, but that option isn’t always available.
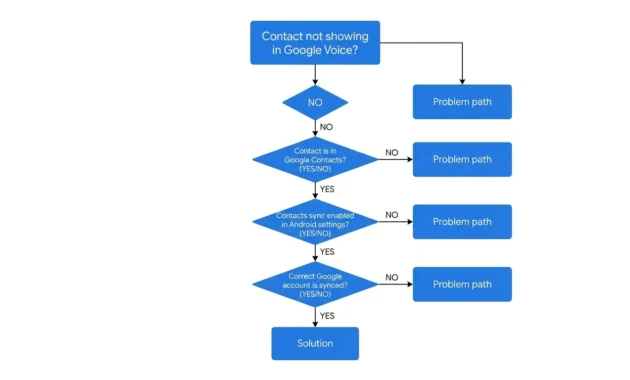
sync problems you’re experiencing.
Problem 2: Contact Sync Is Turned Off
If contact syncing isn’t enabled on your device, new contacts won’t flow to Google Contacts even if you saved them to your Google account.
The fix on Android: Go to Settings → Accounts → Google → [Your Account]. Look for Contact sync or just Contacts in the list of things that sync. Make sure it’s toggled on. If it was off, turn it on and give it a minute to sync.
The fix on iPhone: Go to Settings → Contacts → Accounts → Google → [Your Account]. Make sure Contacts is toggled on. If it was off, turn it on and wait a minute for the sync to run.
Problem 3: Sync Delay Is Normal and You’re Checking Too Soon
Contacts don’t always appear instantly. There’s usually a brief delay while the sync happens.
I’ve seen sync times as short as 10 seconds and as long as a couple of minutes depending on network speed and server load. One verified user reported that a contact they added on iPhone took about 45 seconds to appear in both the Google Voice app and on contacts.google.com.
The fix: Wait. Give it at least a minute before you assume something went wrong.
The mistake I see people make here is adding the same contact multiple times because they don’t see it immediately. Then once sync catches up, they have three or four duplicate entries for the same person in Google Contacts and they have to go delete the extras.
Add the contact once. Wait a minute. Then check.
Problem 4: The Google Voice App Doesn’t Have Contact Permissions
On both Android and iPhone, apps need permission to access your contacts. If you denied that permission when you first installed Google Voice, the app can’t display your contact list even if the contacts exist in Google Contacts.
The fix on Android: Go to Settings → Apps → Google Voice → Permissions. Make sure Contacts permission is set to “Allow.”
The fix on iPhone: Go to Settings → Google Voice. Make sure Contacts is toggled on.
If you just changed the permission, close the Google Voice app completely and reopen it. Sometimes the app needs to restart before it recognizes the new permission.
If you’ve checked all four of these and contacts still aren’t showing up, try signing out of the Google Voice app and signing back in. That forces a fresh sync and often clears up whatever was stuck.
How to Organize Your Google Voice Contacts with Labels
Most people don’t know you can organize Google Voice contacts into categories. But you can, and it’s genuinely useful if you’re managing more than a handful of contacts.
The feature is called labels, and it works through Google Contacts.
Labels act like digital folders. You create a label, assign contacts to it, and then you can filter your contact list by that label. It’s the closest thing Google Voice has to contact groups or categories.
I first saw this in action from a teacher named Byron Adams who uses Google Voice to communicate with parents. He created labels like “First Period Parents” and “Second Period Parents” to organize his contacts by class.
That same idea works for anyone managing different types of contacts. You could create labels like “Clients,” “Vendors,” “Family,” “Work,” or whatever categories make sense for how you use Google Voice.
Here’s how to set it up.
Step 1: Go to contacts.google.com on a computer. Labels are easier to manage on the web than in the mobile app.
Step 2: Click on a contact you want to label.
Step 3: On the contact details page, look for the Labels section. It’s usually in the right column or under the contact’s basic information.
Step 4: Click Add label or the label icon.
Step 5: You can either choose an existing label from the list or type a new label name to create one.
Step 6: Click outside the label field or press Enter to save.
You can assign multiple labels to the same contact. So if someone is both a client and a friend, you can tag them with both labels.
Once you’ve labeled your contacts, you can filter by those labels in Google Contacts. On the left sidebar, you’ll see your label names listed. Click one and you’ll see only the contacts with that label.
Now here’s the limitation on iPhone.
Labels created in Google Contacts on the web don’t always show up in the iOS contacts app. They work fine in Google Voice and in Google Contacts on the web, but the iPhone’s native contacts app doesn’t display or use those labels the same way. So if you’re managing labels, you’ll want to view and use them through contacts.google.com or on an Android device.
There’s one more feature worth mentioning here.
You can add notes to any contact in Google Contacts. Open the contact, scroll to the Notes section, type whatever you want, and save. Those notes are visible when you view the contact in Google Voice.
A Reddit user asked specifically whether there’s a way to add notes to Google Voice contacts, and the answer is yes, through this method. It’s not as robust as a full CRM system, but for basic notes like “prefers email” or “called about billing issue,” it works fine.
How to Edit or Delete Contacts in Google Voice
Once you’ve added a contact, you might need to change their information or remove them entirely.
The process is different depending on which device you’re using.
Editing a Contact on Android
Step 1: Open the Google Voice app.
Step 2: Tap Contacts at the bottom.
Step 3: Tap the contact you want to edit.
Step 4: Tap the three vertical dots in the top right.
Step 5: Tap Edit contact.
Step 6: Make your changes.
Step 7: Tap Save.
The changes sync back to Google Contacts automatically on Android.
Editing a Contact on iPhone
Here’s where the iOS limitation shows up again.
You can edit a contact in the Google Voice app on iPhone, but those edits will not sync back to your iPhone’s contacts app. They’ll update in Google Contacts and in Google Voice, but the iPhone address book stays separate.
The most reliable way to edit a Google Voice contact on iPhone is to go to contacts.google.com in a browser or use the Google Contacts app. Make your changes there, and they’ll sync to Google Voice.
Editing a Contact on Desktop
Go to contacts.google.com, find the contact, click on it, make your changes, and click Save. That’s the cleanest path for editing because you’re working directly with the source.
Deleting a Contact
Deleting works the same way on every platform. Delete the contact from Google Contacts and it disappears from Google Voice.
On the web, go to contacts.google.com, select the contact, click the three dots, and choose Delete.
On Android or iPhone, you can delete from the Google Contacts app or from contacts.google.com.
Once you delete a contact from Google Contacts, it’s removed from Google Voice on all devices within a few seconds.
Bonus Tip: Custom Ringtones and Voicemail Greetings Per Contact
Most people don’t know this feature exists.
You can assign a custom ringtone to individual contacts in Google Voice. You can also set up custom voicemail greetings for specific contacts so that when they call and you don’t answer, they hear a personalized message.
You set this up in the contact’s settings in Google Contacts. Open the contact, look for advanced options or call settings, and you’ll see options for ringtone and voicemail greeting if your account supports it.
It’s not something most people need, but if you want a specific ringtone for work calls or a custom voicemail message for family, the feature is there.
A Few Things Google Voice Won’t Do With Contacts (Worth Knowing Before You Start)
Before you invest a lot of time setting up contacts in Google Voice, there are a few limitations you should know about.
None of these are deal-breakers for most people. But they’re worth understanding upfront so you don’t run into frustration later.
Limitation 1: Google Voice Consumer Version Is for Personal Use Only
Google’s terms for the free consumer version of Google Voice state that it’s designed for personal use. It’s not officially supported for business contact management at scale.
If you’re running a small business and using Google Voice to manage a few dozen clients or customers, you’re probably fine. But if you’re trying to use it as a full business phone system with hundreds of contacts and high call volume, you’re technically outside the intended use case and you risk running into account limitations or restrictions.
For real business use, Google offers Google Voice for Workspace, which is the paid business version. That version has better contact management, integration with organization directories, and official support for business communication.
Limitation 2: iPhone Address Books Cannot Sync With Google Voice
I covered this earlier, but it’s worth repeating here because it’s a hard platform limitation.
On iPhone and iPad, the address book does not sync bidirectionally with Google Contacts when you’re using Google Voice. You can enable Google Contacts to sync to your iPhone, but edits made in Google Voice on iOS will not sync back to your iPhone contacts.
This isn’t a bug. It’s a design difference between iOS and Android. Google’s own support documentation confirms it.
If you’re on iPhone, the best path is to manage contacts through Google Contacts on the web at contacts.google.com and let those changes sync down to Google Voice. Trying to manage everything from the iPhone app will lead to inconsistencies.
Limitation 3: Contacts Added in Google Voice on iOS Don’t Sync Back to iPhone
This is the same limitation from a different angle.
If you add a contact in the Google Voice app on your iPhone, it saves to Google Contacts. But it will not automatically appear in your iPhone’s main contacts app unless you have Google Contacts sync enabled in your iPhone settings.
And even with sync enabled, there’s sometimes a delay or the contact might not show up exactly the way you expect because iOS and Google Contacts handle fields differently.
Limitation 4: No Built-In CRM or Advanced Contact Management
Google Voice is a communication tool. It’s not a customer relationship management system.
You can add contacts, organize them with labels, and add basic notes. But if you need features like contact history tracking, task assignments, sales pipeline management, or detailed interaction logs, Google Voice doesn’t offer that.
There are third-party tools like Streak that integrate with Google Voice and Gmail to add CRM features. But Google Voice itself doesn’t have those capabilities built in.
If you need that level of contact management, you’ll need to use Google Voice alongside a proper CRM tool.
The point of this section isn’t to discourage you from using Google Voice. I use it regularly and it works well for what it’s designed to do. But knowing the limits upfront helps you make better decisions about how to set it up and whether you need additional tools alongside it.
If you decide Google Voice isn’t the right fit for your needs—maybe the contact limitations on iPhone are too restrictive, or you need more robust business features you can always switch to a different service. I’ve written a separate guide on how to delete a Google Voice account if you need to close your account and move to an alternative communication platform.
Frequently Asked Questions
Why does Google Voice show phone numbers instead of names?
Google Voice doesn’t use carrier caller ID like your regular phone does. It only displays a name when that number is already saved in your Google Contacts, otherwise you’ll see just the raw number.
Is there a way to add notes to contacts in Google Voice?
Yes, through Google Contacts. Go to contacts.google.com, open the contact, scroll to the Notes section, add your information, and save—those notes will be visible when you view the contact in Google Voice.
How do I find my contacts in Google Voice?
On mobile, tap the Contacts icon at the bottom of the app. On desktop, go to voice.google.com and click the Contacts section in the left sidebar.
Does Google Voice work differently for Workspace users?
Yes, the paid Workspace version has shared organization contacts, better directory integration, and more robust contact management features. The free consumer version has more limitations and is designed for personal use only.
Can I import contacts to Google Voice from a CSV file?
Not directly, but you can import through Google Contacts and they’ll sync automatically. Go to contacts.google.com, click Import, select your CSV file, and the contacts will appear in Google Voice within a couple of minutes.
Why aren’t my contacts showing up in Google Voice?
The contact was likely saved to your phone account instead of your Google account, or contact sync is turned off in your device settings. Check that the contact is saved under your Gmail address and that sync is enabled in Settings → Accounts → Google.
How do you add contacts to Google Voice?
On Android, open the Google Voice app, tap the Contacts icon at the bottom, tap Add new contact, fill in the name and number, and make sure you’re saving to your Google account before tapping Save. On iPhone or desktop, the most reliable method is to go to contacts.google.com, click Create contact, enter the details, and save—it will sync to Google Voice automatically within a minute.
Final Thoughts
Adding contacts to Google Voice isn’t complicated once you understand how the system actually works.
Google Voice doesn’t store contacts on its own. It reads from Google Contacts. That one fact explains why the steps are different on different devices and why some methods work better than others.
Android users have the smoothest experience because the sync between the Google Voice app and Google Contacts works in both directions. Just make sure you’re saving contacts to your Google account and not to local phone storage.
iPhone users need to know about the platform limitation upfront. The iPhone address book doesn’t sync bidirectionally with Google Voice. You can add contacts in the app, but the most reliable path is to manage them through Google Contacts on the web at contacts.google.com.
Desktop users have the cleanest experience of all because you’re working directly with Google Contacts through the web interface. No app sync to worry about.
If you’re saving contacts from text messages, you need to use the web interface at voice.google.com/messages. The mobile app no longer has that feature built in.
And if contacts aren’t showing up, check three things first. Make sure the contact saved to your Google account and not your phone. Make sure contact sync is enabled in your device settings. And give it a minute for sync to complete before you assume something went wrong.
Once you have your contacts set up, Google Voice works exactly the way you’d expect. Names appear in your call history and message threads instead of raw phone numbers. You can organize contacts with labels. You can add notes for context.
The system works. You just need to understand which path to take for your specific device.