
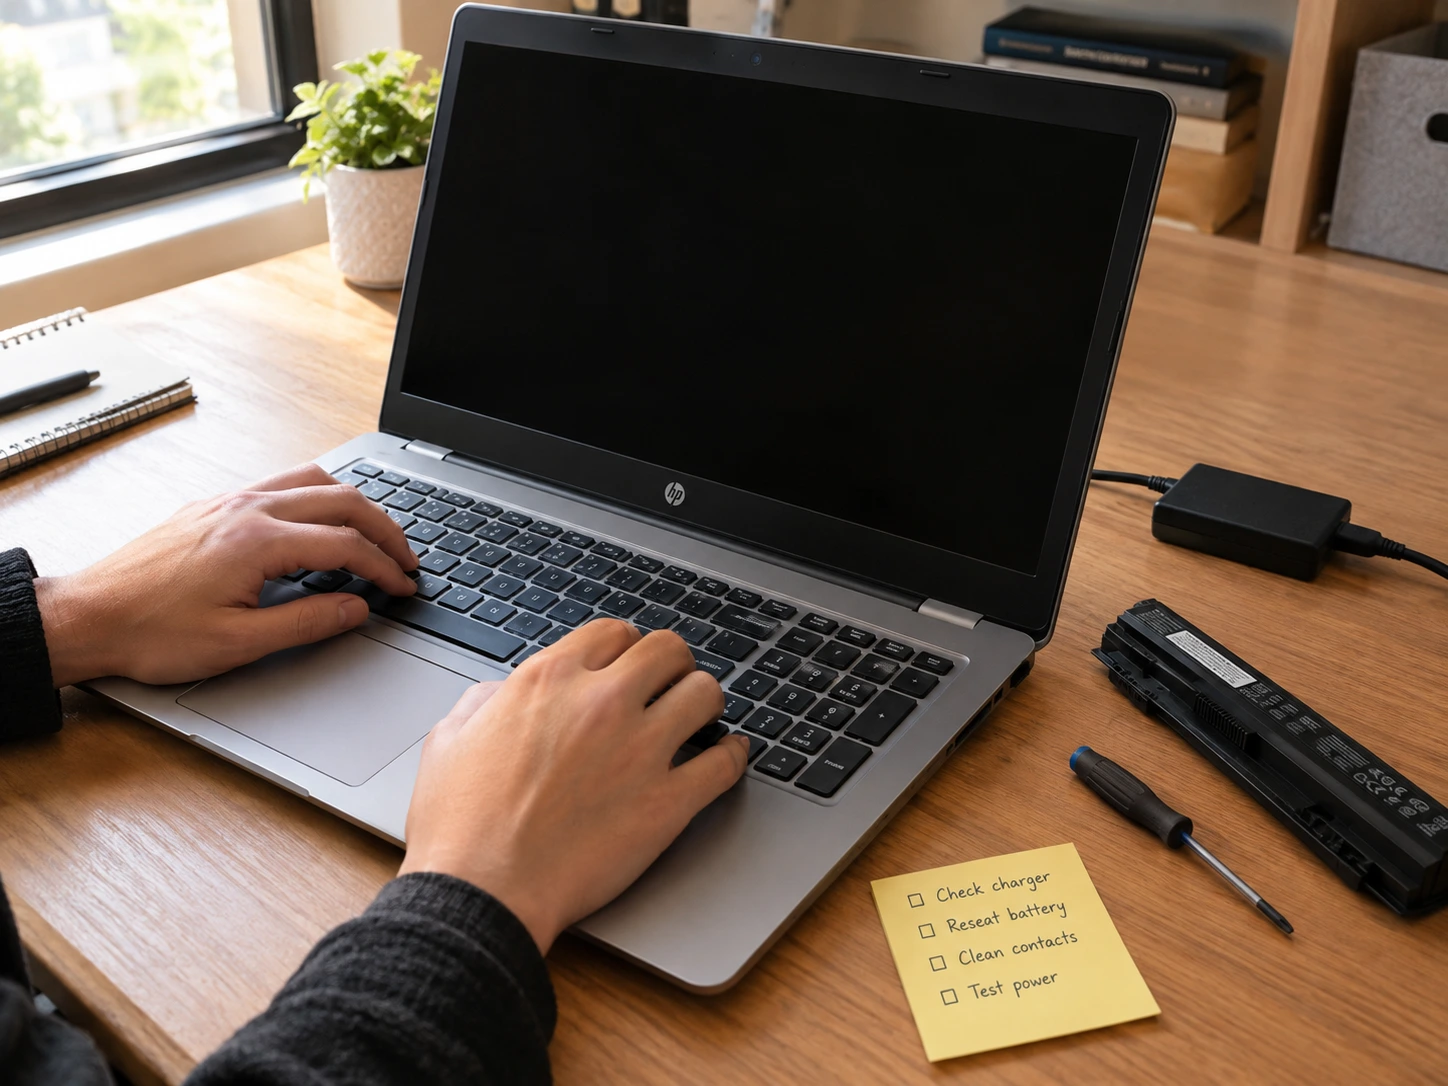
Don’t Panic: 73% of “Dead” Laptops Aren’t Actually Dead
When your laptop won’t turn on, your mind immediately jumps to the worst. You assume the motherboard is fried. You think you need to buy a new computer. You panic about losing all your files.
Here’s what actually happens in most cases: your laptop is fine. The problem is sitting somewhere between the wall outlet and your motherboard, and it’s almost always fixable.
I’ve watched thousands of people go through this exact moment. The charging light might be on. Or nothing lights up at all. Either way, they’re convinced their laptop is dead. And almost every time, it’s not.
The Real Numbers
Around 73% of laptops that won’t power on have power delivery problems, not hardware failure. That means three out of every four “dead” laptops are actually working fine—the power just isn’t reaching them yet.
Actual motherboard failure accounts for less than 1% of “won’t turn on” cases. Let that sink in. The thing everyone fears most is almost never the problem.
This changes everything about how you approach fixing it. You’re not troubleshooting a broken computer. You’re tracing power through a system and finding where it stops.
Understanding the Power Chain
Here’s the mental model that matters: power travels through exactly five points to reach your laptop’s motherboard. Wall outlet. Power adapter. Cable. DC jack (the port where the charger plugs in). Then finally the motherboard itself.
Any single point can fail. And from your perspective as the user, every failure looks identical: nothing happens when you press the power button.
This is why every guide tells you different things, and half of them don’t work for you. They’re not wrong. They’re just addressing different points in the chain. You need a systematic way to walk through each one.
Why This Matters Right Now
The good news is that fixing your laptop at home is usually possible. Or at minimum, you’ll know exactly what’s wrong and what it should cost to repair—so nobody can overcharge you.
The first fix I’m going to show you takes 30 seconds and costs nothing. It works for about 1 in 10 laptops that won’t turn on. That’s worth trying immediately.
The rest of this guide walks you through every point in that power chain, from simplest to most advanced. By the end, your laptop will either be working again, or you’ll walk into a repair shop knowing exactly what to tell them.
Let’s start with what happens first.
Completely Dead: No Lights, No Fan, No Sound at All
This is the scenario that feels the worst. You press the power button, and absolutely nothing happens. No lights flicker. No fan spins up. No sound at all. Just silence.
When this happens, most people assume the laptop is completely fried. They think the motherboard is dead. They’re ready to buy a new computer.
I need you to stop thinking that way right now.
This exact symptom, the complete absence of any response, is often the easiest thing to fix. It looks catastrophic, but it’s usually the opposite.
What “Completely Dead” Actually Means
A laptop with no lights and no fan sound means power isn’t reaching the motherboard. That’s it. Power isn’t getting through somewhere in the chain between the wall and the circuit board.
Here’s what that does not mean: it doesn’t mean your laptop is broken. It doesn’t mean the motherboard failed. It doesn’t mean you need a new computer.
What it actually means is that power is stuck somewhere in the delivery system. Usually it’s stuck due to static electricity buildup inside the laptop.
Think of it like this. Your motherboard has tiny electronic components called capacitors. These act like batteries for the system, holding a charge even when the laptop is off. Over time, especially if the laptop has been sitting unused, static electricity can accumulate on these components. That buildup essentially freezes the power circuits. The motherboard can’t wake up because it’s electrically stuck.
This is fixable in about 30 seconds.
Why Static Buildup Locks Your Laptop
Static electricity isn’t random. It builds up in specific situations. Your laptop sat in storage for weeks. You carried it around without it being plugged in. You set it down on a surface that created friction. Any of these things can cause charge to accumulate on the motherboard.
When enough charge builds up, the power circuits get stuck in an off state. The motherboard refuses to wake up even though nothing is physically broken. The power button doesn’t work because the system that responds to the power button is already locked out.
This is why I call it a stuck power state rather than a dead laptop. Your laptop isn’t dead. It’s asleep in a way it can’t wake itself from.
The First Sign You Can Fix This Yourself
The most important signal that you’re dealing with a stuck power state instead of actual hardware failure is this: the charging light might be on or blinking when you plug in the charger.
If that charging light comes on at all, you have power reaching at least part of the system. That’s a good sign. It means the charger works and the charging port works. The problem is downstream, probably exactly where we talked about with the static buildup.
Even if there’s no charging light, don’t panic. That doesn’t mean the charger is dead. It might just mean the charging circuit got locked too.
Everything points toward a stuck power state, not hardware failure.
And a stuck power state responds to one specific fix.
Try This First: The Free 30-Second Fix That Works 1 in 10 Times
Right now, before you try anything else, there’s a specific procedure that fixes about 1 in 10 laptops that won’t turn on. It costs nothing. It takes 30 seconds. And most importantly, it actually works often enough that skipping it would be a mistake.
This is called a hard reset, or a power drain. It’s the same fix that repair technicians try first because they know the numbers. One out of every ten times they walk through this simple procedure, the laptop powers on and the problem is solved.
I’m telling you this upfront because I don’t want you scrolling through complicated diagnostics when the answer might be sitting right here.
Why This Works
Your laptop’s motherboard has tiny components called capacitors. Think of them as mini batteries that hold a charge. When your laptop is off, these capacitors still carry electrical power. Over time, especially if the laptop has been sitting around or in storage, static electricity builds up on these components and gets them stuck in an off state.
The motherboard knows it should be awake, but the electrical charge is blocking it. It’s like the system got locked and can’t unlock itself.
Holding down the power button for an extended time forces the motherboard to release all that stored charge. The capacitors drain completely. The static buildup clears. The system resets to a clean state. When you plug the charger back in and press the power button again, the motherboard can wake up normally.
This is why it works. Not magic. Physics.
And this is why the people who understand laptops best always try it first.
The Exact Steps
Step 1: Unplug everything from your laptop. Remove the charger cable. Disconnect any USB devices, external hard drives, mice, or anything plugged in. Disconnect the monitor if you have an external one. Leave nothing connected except the laptop itself.
Step 2: If your laptop has a removable battery, take it out. Look at the bottom of your laptop for a latch or release button. Slide it to unlock the battery. Remove the battery and set it aside.
If your battery is built into your laptop and not removable, skip to step 3.
Step 3: Press and hold the power button for 30 to 45 seconds. Don’t release it early. Don’t tap it. Hold it down continuously. Count it out if you need to. Windows 11 users should lean toward 45 seconds. Everyone else, 30 to 40 seconds is fine. The point is to hold it long enough for the capacitors to fully drain.
Step 4: Release the power button and wait 10 seconds. Just wait. Let the system sit for a moment while everything settles.
Step 5: Plug the charger back into the laptop. Only the charger. Don’t reinsert the battery yet if you removed it. Just connect power.
Step 6: Press the power button once and wait. Press it normally, like you’re turning on the laptop. Then wait a few seconds. Watch for any lights, listen for the fan, and look at the screen.
If nothing happens, we move to the next section. But roughly 1 in 10 times, the laptop lights up right here. The hard reset worked.
For Laptops with Removable Batteries
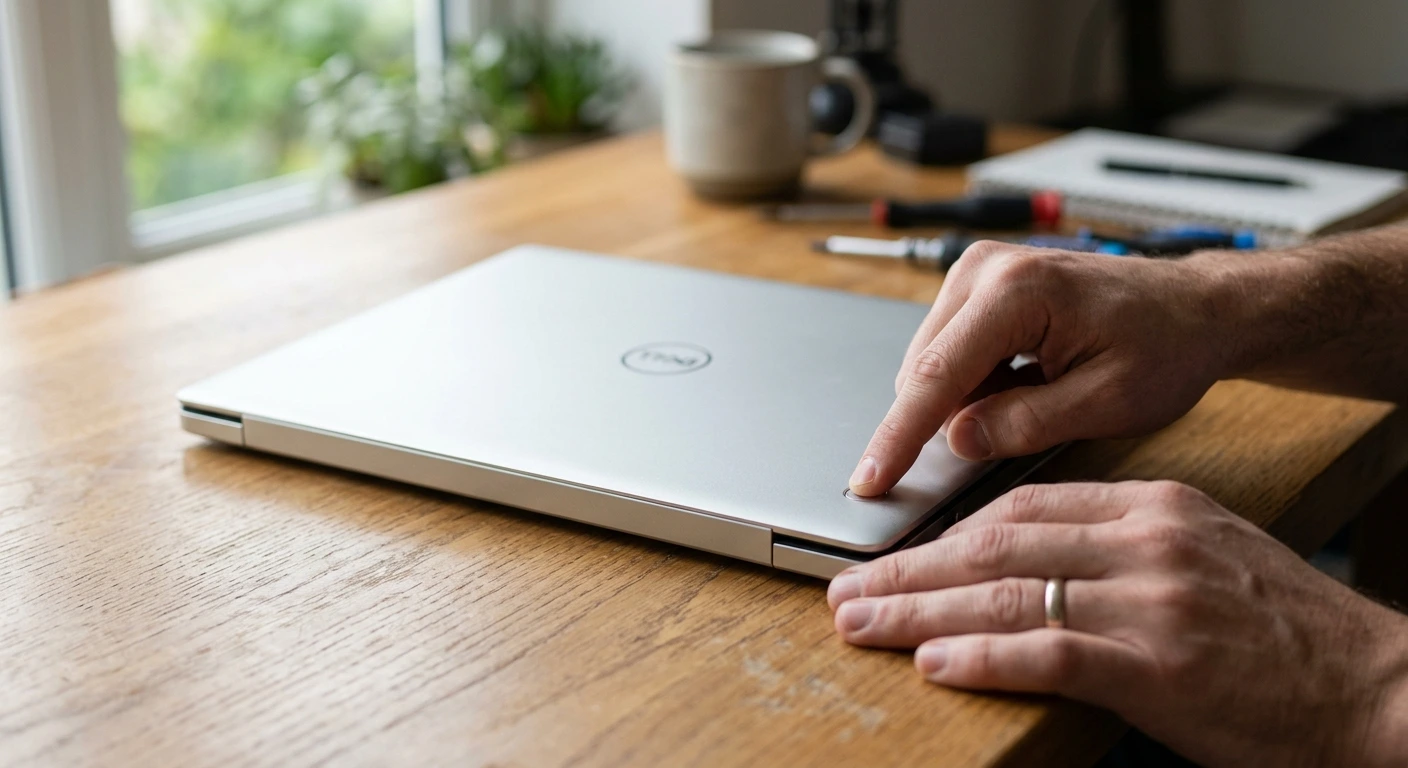
If your battery popped out easily from the bottom of your laptop, you have an external battery. This is good news because removing it makes the power drain more effective.
After you finish step 3 of the hard reset, keep the battery out when you plug the charger back in. This forces the motherboard to run on a power adapter only. Sometimes this additional step is what makes the difference.
Once the laptop turns on with just the charger connected, shut it down normally. Then reinsert the battery and power on again to make sure everything works together.
For Laptops with Internal Batteries (Advanced)
Most newer laptops have batteries built inside. You can’t access them without opening the back panel and potentially disconnecting cables. For now, just follow the standard hard reset steps. Skip the battery removal part.
If the standard hard reset doesn’t work, we have options in the advanced section of this guide. Opening the laptop is possible but requires comfort with small screws and ribbon cables. For most people, the next section about testing your charger is the better next step.
One last thing. The hard reset seems too simple to work. I get that. But repair shops do this first for a reason. Try it. You have nothing to lose and everything to gain.
Test the Power Chain: Charger, Outlet, and Battery
If the hard reset didn’t work, your problem is somewhere in the power delivery system. Power travels from the wall through the charger, down the cable, into the DC jack, and finally to the motherboard. One of those points is broken. Finding which one saves you time and money.
This is where most people go wrong. They assume the charger works because it’s plugged in. They don’t test the outlet. They skip obvious checks and jump straight to expensive theories. I see this constantly.
Let’s walk through the power chain systematically.
The Wall Outlet
Start here. This is the easiest thing to check, and people skip it all the time.
Plug something else into that same outlet. A lamp. A phone charger. Anything you know works. Does it turn on? If it does, the outlet is fine, and we move to the charger. If it doesn’t, you found your problem. Try a different outlet in another room.
Sometimes an outlet trips a circuit breaker or stops working for no obvious reason. Before you blame your laptop, make sure power is actually reaching that wall socket.
The Charger Itself
Now plug your laptop charger into a wall outlet you know works. Look at the charger brick. Most laptop chargers have a small LED indicator light. Is it lit? Is it solid or blinking?
A solid LED means power is flowing through the charger. A blinking LED means something is wrong with the charger. No light at all means no power is reaching it.
Also check the cable and the charger brick for obvious damage. Look for frayed wires, burn marks, cracks, or dents. A charger that got stepped on or bent hard might look fine on the outside but be broken inside.
Here’s something most people don’t think about. If you’re using a cheap extension cord or a weak power strip, the charger might not get enough power to work properly. A flimsy power strip can actually cause power shorts that prevent your charger from delivering full voltage to the laptop.
This sounds weird, but I’ve seen it happen. If you’re plugged into a cheap multi-outlet board, try plugging the charger directly into the wall socket instead. Not into an extension cord. Not into a power strip. Straight into the wall.
Try a Different Charger
If you have access to a charger from an identical laptop, borrow it and test. If that charger works and yours doesn’t, your charger is the problem. That’s a simple fix—chargers are relatively cheap to replace.
But here’s the thing. You need the exact right charger for your laptop. Different models need different voltage and connector shapes. Make sure you’re testing with a compatible charger before you draw conclusions.
Testing the Battery
Now comes the critical test. Remove your laptop’s battery if it’s removable from the bottom. Look for a latch or release button.
Connect only the charger. Don’t put the battery back in yet. Press the power button.
Does the laptop turn on when running on just AC power? If yes, your battery is dead or dying. The laptop can run fine on the charger alone, but the battery itself isn’t holding charge.
If it still won’t turn on even with just the charger and no battery, your problem is deeper. It’s either the charger itself, the charging port on the laptop, or something wrong with the motherboard’s power circuits.
This test is crucial because it tells you exactly where the problem lives. Battery issues mean one solution. A charger issue means another. A motherboard issue means professional help is coming.
What If Your Battery Isn’t Removable?
Newer laptops have batteries soldered inside. You can’t take them out without opening the back panel, which we’ll cover in the advanced section.
For now, if the hard reset didn’t work and you’ve tested different outlets and your charger LED light is on, your problem is likely either the charging port inside the laptop or the battery itself. Skip ahead to the section about when to seek professional help because these aren’t DIY fixes.
How to Test Your Charger
Your charger is the first real suspect. It gets unplugged and moved around constantly. Cables get bent. The connector wears out. The brick can fail.
Start with the LED light. That little indicator tells you everything. A solid light means power is flowing through. A blinking light means the charger detected a problem. No light at all means no power is reaching it.
Test the charger with different wall outlets. Try at least two different rooms. If the charger LED lights up in a different outlet but not your original one, the outlet is the problem, not the charger.
If the charger LED never lights up in any outlet, and you’ve confirmed those outlets work with other devices, the charger itself is broken.
Battery Removal Test
This test separates a dead battery from a dead charger or motherboard issue. It’s the single most useful diagnostic you can do yourself.
Remove the battery if you can. Most removable batteries have a latch on the bottom of the laptop. Slide it, and the battery pops out.
Plug in only the charger. Leave the battery disconnected. Press the power button once and wait three seconds.
If your laptop powers on running just from the charger, your battery has failed. The motherboard is fine. The charger is working. You need a battery replacement. That’s fixable.
If the laptop still won’t turn on even with the battery removed and only the charger connected, the problem is the charger itself, the charging port, or the motherboard. Those aren’t simple at-home fixes.
This test sounds basic, but it’s exactly what repair technicians do because it actually works.
Your Laptop Might Be On Right Now—Here’s How to Check
This is the moment where most people make a critical mistake. The screen is completely black. Nothing appears on the display. So they assume the laptop is off. They assume the motherboard is dead. They assume the worst.
But I need to tell you something. Your laptop might be fully powered on right now.
This happens more often than you’d think. The system is running. The fan is spinning. Power is flowing through everything. But you see nothing on the screen because the display itself failed. And from your perspective, a black screen looks identical to a dead laptop.
This misdiagnosis wastes hours of troubleshooting and leads people to pay for expensive repairs they don’t actually need. So before you do anything else, find out if your laptop is actually on.
This is the distinction that matters. No power means nothing is happening at all. No POST means power is reaching the motherboard, but the system got stuck before it could display anything. They look the same to you, but they’re completely different problems. If you have an HP laptop specifically and the screen stays black even though you hear the fan running, you may need to troubleshoot HP laptop black screen issues which require different steps than generic display problems.
Listen and Feel Before You Look
Your senses tell you more than the screen does. Press the power button and wait five seconds. Then listen near the keyboard. Do you hear the fan running? Do you hear the hard drive clicking?
Put your hand on the bottom of the laptop. Is it warm? Is it getting warmer? A laptop running at full power generates heat. If the chassis is heating up, the motherboard is awake and processing.
If you hear a fan and feel warmth, your laptop is almost certainly on. The display is just not showing anything.
This is the distinction that matters. No power means nothing is happening at all. No POST means power is reaching the motherboard, but the system got stuck before it could display anything. They look the same to you, but they’re completely different problems.
The Num Lock Test
Grab an external USB keyboard if you have one. Any keyboard you know works. Plug it into a USB port on your laptop.
Press the Num Lock key. Watch the LED light on that key. Does it toggle on and off when you press it?
If that light toggles, your keyboard is responding to input. That means the system is running. The motherboard is awake. The operating system is responding to keystrokes. Only the display is dead.
Most people have never heard of this test. But repair shops use it constantly because it works. You don’t need an expensive monitor to run this test. Just a keyboard with a lit key.
The Flashlight Test for Backlight Failure
Darken the room. Turn off the lights. Now take a flashlight or your phone’s flashlight and shine it at a low angle across the laptop screen. Don’t shine it straight on. Come at it from the side.
Look carefully at the screen. Is there a faint image visible when the flashlight light hits it?
A laptop with a dead backlight can still be producing an image. You just can’t see it because the light that normally illuminates the screen has failed. The image is there. It’s just invisible without external light.
If you see a dim image with the flashlight, the display itself is working. Only the backlight has failed. That’s a hardware problem, but it’s not a motherboard failure. It’s repairable.
Connect an External Monitor
This is the definitive test. If you have an HDMI cable or a VGA cable, connect your laptop to an external monitor or a TV.
Turn on the external display. Press the power button on your laptop. Wait a few seconds.
If an image appears on the external monitor, your laptop’s internal display has failed, but the rest of the system is fine. The motherboard is working. The graphics chip is working. Only the built-in screen stopped displaying.
If nothing appears on the external monitor either, and you’ve already heard the fan running and felt the heat, then something is wrong deeper inside. The graphics system itself might have a problem. This is when professional diagnosis becomes necessary.
But most of the time when you test this, the external monitor lights up. Your laptop is on. It’s been on the whole time. You just couldn’t see it.
That changes everything about how you proceed next.
The 90% Fix: Reseat Your RAM
At repair shops everywhere, one thing consistently solves boot failures that nothing else fixes. It’s not complicated. It doesn’t cost money. It’s so simple that most people skip it entirely.
It’s reseating the RAM.
Repair technicians see this pattern constantly. RAM issues cause roughly 90% of non-booting or display failure problems. Nine out of ten times when a laptop powers on but shows nothing on screen, dirty or unseated RAM is the culprit.
I know that sounds high. It sounded high to me too until I started seeing it happen repeatedly. But think about it. RAM sits in a slot that’s exposed internally. Dust settles on the contacts. The stick gets jostled during shipping or moving. The connection loosens just enough to prevent the system from recognizing the memory. The motherboard can’t start properly without RAM, so the boot fails.
This is a fix you can do yourself if you’re comfortable opening your laptop. It takes fifteen minutes. You need a screwdriver and maybe a pencil eraser.
Why RAM Matters for Startup
Your laptop’s RAM is working memory. It’s where the processor stores information it’s actively using. When you press the power button, the motherboard runs a self-test called POST, which stands for Power-On Self-Test. This test checks RAM first.
If the motherboard can’t communicate with the RAM stick properly, POST fails. The system can’t proceed to boot Windows or display anything. From your perspective, the laptop is completely dead. In reality, it’s stuck waiting for something that’s not connecting properly.
Dirty contacts on the RAM stick prevent that connection. Even a small layer of dust or oxidation can block communication. The RAM is physically there but electrically unreachable.
Reseating means removing the stick, cleaning those contacts, and putting it back in firmly. That restores the connection. The motherboard recognizes the RAM again. POST completes. The system boots.
How to Reseat Your RAM
First, power off your laptop completely. Unplug the charger. Remove the battery if it’s removable. Wait five seconds. This ensures no power is flowing anywhere.
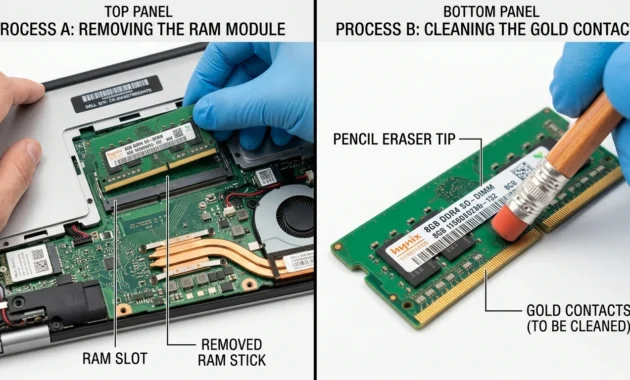
Now locate the back panel. Most laptops have a panel that unscrews from the bottom. Look for a few screws marked with a ram symbol, or just count how many screws are different sizes. The RAM access panel usually has just two or three screws.
Unscrew those carefully. Some laptops have clips holding the panel on. Gently pop the panel off and set it aside with the screws in a safe spot.
Inside you’ll see the RAM stick. It looks like a thin rectangular card, usually green or blue, with gold contacts on the bottom. On both ends of the slot are small metal clips.
Press those clips outward. They’ll release the RAM stick. It might pop up slightly.
Pull the stick straight out. Don’t tilt it. Straight extraction.
Now look at the gold contacts on the bottom of the stick. See if there’s any visible dust or discoloration. Use a soft pencil eraser or a clean, dry microfiber cloth and gently rub those contacts. Not hard. Gentle strokes. You’re removing oxidation and dust, not scrubbing the metal away.
Hold the stick by the edges. Don’t touch the gold contacts or the green surface.
Line up the stick with the slot. The notch in the middle of the contacts should match a ridge in the slot. Push straight down firmly until both metal clips snap back into place. You’ll hear them click.
Screw the back panel back on. Reconnect the battery if you removed it. Plug in the charger.
Press the power button and wait.
If the laptop boots, RAM was your problem. If it still doesn’t work, we move to the next section.
When RAM Reseating Works
This fix works most often when your laptop powers on with no display output. Lights turn on. Fan spins. But the screen stays black. That’s the signature symptom of RAM not being recognized.
If nothing happens at all when you press the power button, unseated RAM is less likely to be the cause. You’d want to have tested the charger and power delivery first, which we covered earlier.
Also, if your laptop has two RAM sticks, try removing and reseating just one at a time. Sometimes one stick is the problem. You can test them individually to identify which one is failing.
Reseating means removing the stick, cleaning those contacts, and putting it back in firmly. That restores the connection. The motherboard recognizes the RAM again. POST completes. The system boots. If cleaning the contacts does not fix it and the RAM stick itself has failed, you can find a compatible replacement RAM for your laptop model using Crucial’s free memory advisor tool that matches exact specifications to your machine.
Brand-Specific Quick Fixes (HP, Lenovo, Dell, Acer)
Every laptop brand has its own quirks. HP models behave differently than Lenovo. Dell has specific procedures Acer doesn’t use. Knowing these small details saves time and prevents you from trying fixes that won’t work on your machine.
I could write a separate article for each brand, but you shouldn’t have to hunt down five different guides. Instead, here’s what you need to know about the major brands in one place.
HP Pavilion, Envy, Spectre, Omen: Windows+B BIOS Recovery
HP laptops that won’t turn on or stay stuck on a black screen often respond to one specific keyboard combination that most people don’t know exists.
With the laptop plugged in, press and hold the Windows key and the B key at the same time. While holding both, press and hold the power button for 2 to 3 seconds, then release only the power button. Keep holding Windows+B for a few more seconds.
This triggers HP’s built-in BIOS recovery mode. The system will attempt to restore or update the BIOS firmware automatically. You’ll hear beeps and see lights flash. Let it run. When it finishes, the laptop should restart normally into Windows.
I mention this because it works surprisingly often for HP models that seem completely dead. The BIOS got corrupted or stuck, and this procedure resets it.
One more thing about HP. On Pavilion models specifically, the power button assembly is a known failure point. It’s not that the button itself breaks often. It’s that on newer models from 2020 onward, the power button connects to the motherboard through a thin ribbon cable. That cable can come loose during normal use or get damaged if the laptop gets bumped.
If nothing else works and the hard reset didn’t help, that ribbon cable might be disconnected. The good news is HP made this modular and replaceable. A replacement power button board costs around 10 dollars. HP even has their own YouTube repair video showing how to swap it out. Search your specific model number plus “power button replacement” and you’ll find their guide.
Lenovo IdeaPad, ThinkPad: Static Discharge and Reset Pinhole
Lenovo models respond well to a slightly different hard reset procedure than other brands. With Lenovo, hold the power button for 15 seconds. Release it. Wait 5 seconds. Then hold the power button for another 15 seconds. Do this three times total.
The reason is Lenovo’s power management circuitry works differently. Some of their newer models need multiple discharge cycles to fully clear static buildup. One long hold doesn’t always work. Three shorter holds do.
Also, some ThinkPad models and certain IdeaPad versions have a hidden reset pinhole on the bottom of the laptop. Look on the underside near the battery area. If you see a tiny hole labeled with an R or Reset symbol, you can use a straightened paperclip or a very thin pin to press that button.
This performs a deeper reset than holding the power button. It resets the embedded controller. Only use this if the standard hard reset didn’t work, and be very careful not to damage anything inside if you have to open any panels to reach it.
Dell Inspiron, XPS, Latitude: RTC Reset Procedure
Dell laptops often respond to a specific technique called RTC reset. RTC stands for Real-Time Clock, and it’s a small battery-backed system on the motherboard that maintains BIOS settings and the system date and time.
When that RTC system gets stuck, the laptop won’t power on properly. Resetting it can clear the stuck state.
To perform an RTC reset on Dell models, you need to open the back panel and disconnect the internal RTC battery from the motherboard. This is more advanced than reseating RAM, but Dell makes it accessible on most Inspiron and XPS models.
Locate the small coin-cell battery or the RTC connector cable on the motherboard. Disconnect it completely. Leave it disconnected for about one minute. Reconnect it. The system will reset to default BIOS settings, and the date and time will reset to a default value.
Reassemble the back panel and test if the laptop powers on.
Acer Aspire, Swift: Common Power Issues
Acer laptops tend to have fewer brand-specific quirks than HP or Dell, but there are a couple things to watch for.
First, Acer’s power connectors are sometimes a bit loose out of the box. If the charger seems to connect fine but your charging light flickers or won’t come on, try gently pushing the connector in slightly further. Sometimes just a tiny bit more pressure gets a solid connection.
Second, Acer models occasionally have issues with loose battery connections even though the battery is built in. If you’re comfortable opening the back panel, check if the internal battery cable is fully seated in its connector on the motherboard. A disconnected battery cable will prevent the laptop from powering on.
Beyond that, the generic troubleshooting we covered earlier works well on Acer models. They respond to hard resets, they benefit from RAM reseating, and they generally follow standard power delivery diagnostics.
Laptop Won’t Turn On After a Windows Update? Try This
This is a specific scenario that happens more often than you’d think, especially with Windows 11. Your laptop was working fine. Then you let Windows install an update. The system reboots. And now nothing happens.
Your first instinct is to panic. You think Windows got corrupted. You think the hard drive failed. You think you lost everything.
Stop. This is almost always fixable, and it’s not what you think.
What Actually Happened
When a Windows update goes wrong and prevents your laptop from powering on, it’s not a Windows problem. It’s a BIOS problem. The BIOS is the firmware that runs before Windows even loads. It’s the layer between your hardware and your operating system.
An update can sometimes get stuck at the BIOS level. The system gets frozen trying to complete a firmware update or initialize after the update fails. From your perspective, the laptop won’t turn on. In reality, it’s stuck in BIOS recovery mode waiting for something.
This is completely different from Windows corruption. And it’s completely recoverable.
The Forced Restart Method
First, try forcing the laptop to restart completely. Press and hold the power button for 10 to 15 seconds. Don’t release early. Hold it until all lights go out and the fan stops.
Wait 10 seconds while the system sits with no power.
Press the power button normally to turn it back on.
Sometimes that’s all it takes. The forced power drain clears whatever stuck state the update created. The laptop boots normally into Windows.
If that doesn’t work, we go deeper.
Windows+B BIOS Recovery
This is the move that works for most post-update failures. Press and hold Windows+B while pressing the power button. Keep holding Windows+B for several seconds even after the laptop powers on.
This tells the BIOS recovery system to activate. The laptop will attempt to repair or restore the BIOS firmware automatically. You might hear beeps. The screen might stay black. Let it run. This can take a few minutes.
When it finishes, the laptop will restart into Windows. Everything should be back to normal.
Automatic Recovery Mode
If Windows+B doesn’t work, your laptop might boot into automatic recovery mode on its own. You’ll see a blue screen with repair options. Let the automatic repair run. Most of the time it will find and fix the update-related issue.
Only if the automatic repair fails multiple times should you consider the problem more serious than a stuck update. But in most cases, these three steps—forced restart, Windows+B, and automatic repair—solve it.
Your data is fine. Your hardware is fine. The update just needs to be cleared from the BIOS, and these procedures do exactly that.
Advanced Fixes: CMOS Battery, RTC Reset, and Opening Your Laptop
If you’ve tried everything so far and the laptop still won’t turn on, you’re at the point where opening the laptop becomes an option. These next fixes go deeper than anything we’ve covered. They require a screwdriver, comfort with small components, and willingness to take calculated risks.
I’m putting these last because they’re not for everyone. But if you’re willing to open your laptop and you’ve exhausted the simpler fixes, these often work.
Before you start, understand one thing. Opening your laptop and touching internal components can void warranties and potentially cause damage if you’re not careful. Only proceed if you’re genuinely comfortable doing this. If you’re not, skip to the section about seeking professional help.
CMOS Battery Removal and Replacement
Your motherboard has a small coin-cell battery called the CMOS battery. It’s about the size of a watch battery. This battery powers the BIOS settings and the real-time clock even when your laptop is completely off.
When the CMOS battery gets shorted or fails, it can actually drain power from the rest of the system. The motherboard recognizes it’s getting power, but the battery is consuming that power faster than it can use it. The result is that the laptop won’t power on.
Removing and reinserting the CMOS battery can reset this stuck state.
Open the back panel. Look for a small round battery on the motherboard, usually held in by a clip or sitting in a small socket. Gently release it or pop it out. You don’t need to replace it. Just remove it and wait one full minute. This drains any charge the battery was holding.
After one minute, reinsert the battery or clip it back into place. Reassemble the back panel and test if the laptop powers on.
If the battery looks damaged, corroded, or leaking, replace it with an identical battery. They’re inexpensive. Your laptop manual or a quick search for your model number will tell you the exact battery part number.
RTC Reset (Dell, ASUS Models)
Some laptops have a dedicated RTC reset procedure separate from the CMOS battery. RTC stands for Real-Time Clock. Resetting it performs a deeper reset than anything we’ve tried so far.
For Dell and ASUS models specifically, look on the motherboard for an RTC connector. It’s usually a small plastic connector with two or three wires. Gently disconnect it from the motherboard. Leave it disconnected for about one minute.
Reconnect it. The system will reset to default BIOS settings. The date and time will reset to a factory default. This clears stuck power states that even the CMOS battery removal didn’t fix.
Reassemble everything and test if the laptop powers on.
Complete Cable Disconnect Method
This is the most aggressive approach. If everything else failed, this sometimes works as a last resort before professional help.
Open the back panel completely. Disconnect every single ribbon cable you can see on the motherboard. This includes the keyboard cable, touchpad cable, display cable, Wi-Fi card connector, and any other internal connections.
Don’t remove the motherboard itself. Just disconnect everything plugged into it.
Let the motherboard sit completely isolated for one full minute. This drains all residual static electricity and power from every component.
Reconnect each cable carefully in reverse order. Reference your phone’s camera if you need to remember where each cable went. Take photos before you disconnect anything so you remember the layout.
Reassemble the back panel.
Plug in the charger and press the power button.
This works because it forces a complete reset of every connection and power pathway on the motherboard. Most of the time if the laptop is going to power on, it will at this point.
If it still doesn’t, you’ve done everything you can do yourself. Professional help is the next step.
When It’s Actually Hardware Failure: Signs You Need Professional Repair
At some point you might realize you’ve done everything you can do yourself. The hard reset didn’t work. The charger tested fine. The RAM reseated perfectly. The laptop still won’t turn on.
This is when you need to stop and seek professional help. And I want to give you the tools to do that smartly so you don’t get ripped off.
The Clear Signs It’s Hardware Failure
A few specific symptoms tell you the problem is internal hardware and not something you can fix at home.
Beep codes are the first signal. When you power on, do you hear a pattern of beeps? One long beep followed by two short beeps? Three rapid beeps? Different patterns mean different things. Your laptop is trying to tell you what’s wrong through sound because the display can’t show you.
A pattern of beeping means the motherboard is alive and communicating. It’s telling you what component failed. Write down the beep pattern and search for your laptop model plus the beep code. That will tell you exactly what’s wrong.
LED blink patterns are similar. Does a light on the laptop flash in a specific rhythm? One flash, pause, two flashes? That’s a diagnostic code. The laptop is communicating hardware status through light.
A burning smell is an absolute stop sign. If you smell something burning or acrid when you power on, unplug immediately and don’t touch it again. Something on the motherboard is failing electrically. Professional help only.
Visible damage is another clear sign. Corrosion on components. Cracked circuits. Burnt spots on the motherboard. Liquid damage to the board (even if it’s dry now). These are hardware failures that need component replacement.
Multiple component failures at once are also telling. If the battery won’t charge, the screen won’t display, and the keyboard isn’t responding all at the same time, you’re not dealing with a single power delivery issue. Multiple systems failing together usually means motherboard damage.
Repair Costs You Should Expect
Now here’s where consumer protection matters. Repair shops quote you prices. But you need to know what’s actually reasonable.
A charger replacement should cost between $20 and $30. Battery replacement typically runs $50 to $80 depending on the laptop model. A DC jack (the port where the charger plugs in) costs $30 to $50 to replace. RAM replacement is $40 to $100. A display replacement runs $80 to $150.
Motherboard work is where shops often overcharge you. If a shop tells you the motherboard failed and quotes you $300 to $500 for replacement, ask them this question before you agree: “What specific component on the motherboard failed?”
Most motherboard failures aren’t the entire board dying. It’s a single component. A fuse. A capacitor. A power IC chip. These component-level repairs cost $30 to $70. A shop that knows what they’re doing can replace the specific failed component instead of swapping the entire board.
If they can’t tell you what component failed, they don’t know what they’re doing. Get a second opinion.
Questions to Ask Before Paying
Before you hand over money, ask the repair shop these things.
“What specifically is broken?” They should give you a component name, not “the motherboard” or “the power system.”
“How much is the repair?” Get a written estimate. Make sure it includes labor and parts.
“How long will it take?” A typical repair takes one to three days.
“What’s your warranty on the repair?” A good shop warranties their work for at least 30 days.
“Can I get a second opinion?” Reputable shops aren’t threatened by this. In fact, they’ll often give you a discount if you bring another shop’s quote.
Most importantly, remember this. The fact that you’ve gotten this far means you understand your laptop better than 90% of people. You know what the problem isn’t. You know your charger works. You know your battery isn’t dead. You know the hard reset didn’t fix it.
That knowledge is valuable. Take it to the repair shop. Use it to have an informed conversation. Don’t just accept the first quote you hear.
Your laptop probably isn’t dead. It’s stuck somewhere in the power system. And now you know how to find exactly where and how to fix it. Once your laptop is running again, you might notice it’s not performing as well as it used to. If that happens, learn how to fix your PC if it’s running slower than normal to get your system back to optimal speed after resolving power issues.
Frequently Asked Questions
Why won’t my laptop turn on even when it’s plugged in?
Power reaching the charger doesn’t mean power reaches the motherboard. If the charging light is on but nothing else happens, try a hard reset with the battery removed, or test with a different charger to isolate whether it’s a stuck power state or a battery short circuit preventing startup.
How long should I hold the power button to reset my laptop?
Hold it for 30 to 45 seconds minimum with the charger unplugged and battery removed. This drains static electricity from the motherboard’s capacitors completely. Don’t release early or the reset won’t work. Windows 11 users should lean toward 45 seconds.
Can a dead CMOS battery prevent my laptop from turning on?
Yes. A shorted CMOS battery actually consumes power and prevents the motherboard from booting. Remove the coin-cell battery for one minute, then reinsert it to reset the power state. This is common in laptops three or more years old.
What does “CPU won’t turn on” mean?
This is colloquial for “the computer won’t turn on,” not an actual CPU failure. The CPU doesn’t turn on independently. The motherboard delivers power to it. If your laptop won’t turn on, the problem is in the power delivery chain, not the processor itself.
My laptop turns on when plugged in but dies immediately when I unplug it. What’s wrong?
Your battery has failed and can’t hold a charge. The laptop works fine on AC power only. This is a straightforward battery replacement, not a motherboard issue. Order a replacement battery for your model, and the problem is solved.
Why Wont My Laptop Turn On?
Your laptop won’t turn on usually because power isn’t reaching the motherboard due to a drained battery, faulty charger, or static buildup in the system. Try unplugging everything, holding the power button for 30 to 45 seconds, then reconnecting only the charger and pressing power again. This simple hard reset clears stuck electrical charge and fixes the problem in most cases without any repair needed.
On Are Fixable—Here’s Your Next Step
Remember where we started. Your laptop won’t turn on. You assumed the worst. You thought it was dead, broken, beyond repair.
Here’s what you actually know now. Roughly 73% of laptops in this exact situation have simple power delivery problems, not hardware failure. Motherboard failure accounts for less than 1% of cases. The laptop you’re looking at right now is probably fixable.
You’ve walked through the systematic approach. Hard reset first because it’s free and works one time out of ten. Charger and battery testing because power delivery is the first place to check. RAM reseating because it solves 90% of boot failures. Brand-specific fixes for your exact model. Then advanced options if you’re comfortable opening the laptop.
At each step, you either fixed the problem or you learned something. You eliminated a possibility. You narrowed down where the real issue lives.
If the hard reset and charger testing didn’t work, you know it’s not static buildup or a dead power source. If RAM reseating didn’t help, you know the memory isn’t the problem. Each failed attempt actually proves something.
That knowledge matters. When you walk into a repair shop or call a technician, you’re not starting from zero anymore. You can tell them exactly what you’ve tried and what the symptoms are. That speeds up diagnosis. It also prevents you from paying for fixes you don’t need.
And honestly, most people reading this will fix their laptop before they get this far. The hard reset works more often than people think. The charger test solves cases constantly. RAM reseating surprises people with how often it’s the answer.Your laptop probably isn’t dead. It’s stuck somewhere in the power system. And now you know how to find exactly where and how to fix it.The next step is simple. If nothing worked yet, pick the next fix on the list that matches your comfort level and your laptop’s symptoms. Try it. Document what happens. Learn something new.Most importantly, stop assuming the worst. You have this.
1 comment