
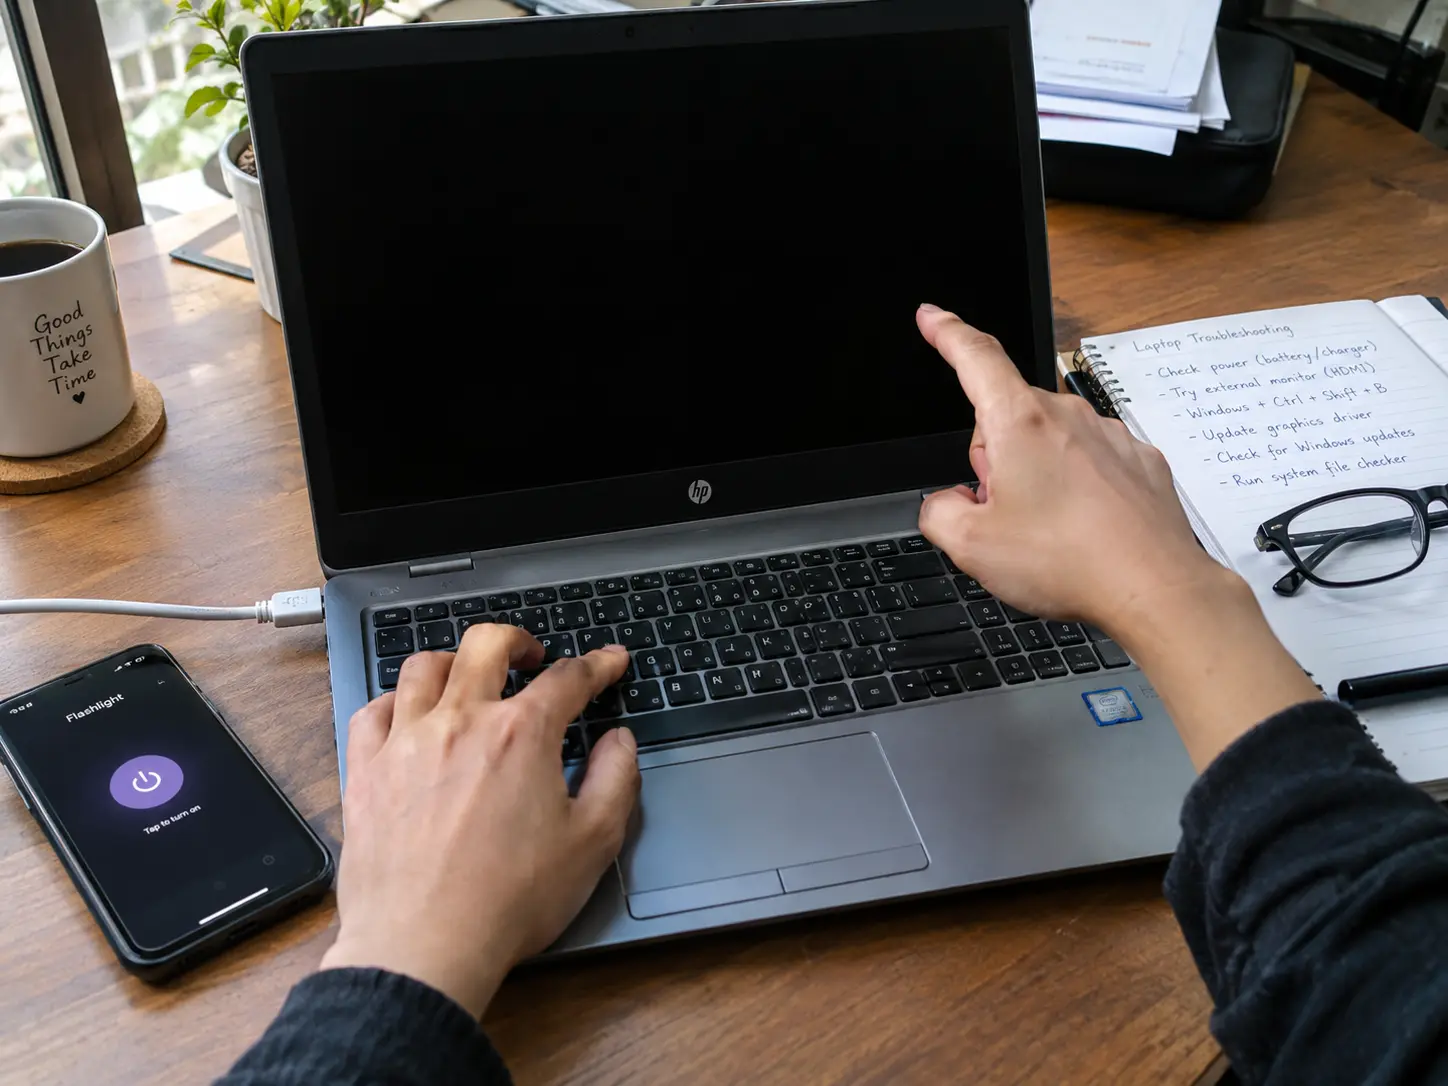
Why Your HP Laptop Screen Went Black (And What to Check First)
I know exactly how it feels when your HP laptop screen suddenly goes black. You press the power button, hear the fan spinning, see the power light on, and then… nothing. Just a blank screen staring back at you.
Here’s what most people don’t realize: a black screen on your HP laptop almost never means your display is physically broken. Most of the time, it’s a software glitch, a confused graphics driver, or Windows doing something in the background that makes it look like your laptop just died.
Let me explain the three main reasons this happens.
First, graphics driver issues. Your laptop’s graphics driver is the software that tells your screen what to display. Sometimes it crashes or gets stuck, especially after a Windows update. The screen goes black, but your laptop is still running perfectly fine underneath.
Second, Windows Explorer crashes. If you see a black screen but your mouse cursor is still visible, that’s Windows Explorer giving up. It’s the part of Windows that shows your desktop, taskbar, and icons. When it crashes, everything disappears except the cursor.
Third, actual hardware problems. This could be a loose display cable, a failing screen, or RAM that needs reseating. But this is the least common cause, not the first thing to assume.
Before you panic or assume the worst, check these three things right now.
Is your charger plugged in? I’ve seen this more times than I can count. The screen went black during use because the battery simply died. Plug in your charging cable and wait 30 seconds. Sometimes that’s all it takes.
Did you accidentally hit the brightness keys? Some HP laptops let you turn brightness all the way down to zero, which looks identical to a black screen. Press the brightness-up key (usually F3 or F10 depending on your model) a few times and see if anything appears.
Are you waiting long enough? If your laptop just started and the screen is black, wait at least five full minutes before doing anything. Windows might be installing updates in the background, or the BIOS might be running a hardware check. Forcing a restart during a BIOS or Windows update can corrupt your system and make the problem ten times worse. Just wait.
Most HP laptop screen issues fall into the software category. That’s good news because software problems are fixable at home, usually in under five minutes, without paying a repair shop or buying any parts.
The key is figuring out which type of black screen you’re dealing with. Power light on but nothing on the screen? Laptop running but display dead? Black screen with a cursor? Each one has a different fix, and I’ll walk you through all of them in the sections below.
But first, try the fastest possible fix. It works for about half of all black screen cases, and it takes exactly two seconds.
The 2-Second Fix Most HP Users Don’t Know About
There’s a keyboard shortcut that fixes most HP laptop black screens in about two seconds, and almost nobody knows it exists.
Press Windows + Ctrl + Shift + B all at the same time.
That’s it. Four keys pressed together. What this does is force your graphics driver to restart without rebooting your entire laptop. The Windows Ctrl Shift B shortcut resets the graphics driver at the operating system level, which means Windows wakes up the part of your system responsible for sending images to your screen.
And here’s the thing. This works on both Windows 10 and Windows 11. HP recommends it. Microsoft recommends it. But I’d say fewer than one in twenty HP laptop owners have ever heard of it.
Why does this fix so many black screens? Because most of the time when your HP laptop screen goes black but the laptop itself is still running, the problem isn’t your display hardware. The graphics driver has crashed or gotten stuck, and your screen can’t show anything until the driver restarts. That’s what this shortcut does.
You don’t need to see your screen to do this. Just press the four keys at once. Then listen and watch.
What to Expect When You Press Win+Ctrl+Shift+B
You’ll hear a short beep. One quick sound.
The screen will flash or flicker for a split second. Sometimes it goes completely black for a moment before coming back. That flash is the graphics driver restarting.
If the fix works, your screen comes back within two to three seconds. You’ll see your login screen, your desktop, or whatever you were looking at before the screen went black. Everything just reappears like nothing happened.
If it doesn’t work, the screen stays black and you hear nothing. That means the black screen isn’t caused by a stuck graphics driver, and you need to try the next fix instead.
I always try this shortcut first. Every single time. Because when it works, it saves you from doing a hard reset, digging into Safe Mode, or any of the longer troubleshooting steps. Two seconds versus twenty minutes makes it worth trying even if you’re not sure it’ll help.
One more thing. This shortcut works when your laptop is running but the screen is black. If your laptop won’t power on at all, or if you’re stuck at a black screen before Windows even loads, this won’t help. You need a different fix for those situations, and I’ll cover those next.
But if your HP laptop turned on, you heard the startup sounds or the fan spinning, and then the screen just stayed black? Try the Windows + Ctrl + Shift + B shortcut right now before you do anything else.
HP Hard Reset: The Complete Power Drain Method
If the graphics driver reset didn’t bring your screen back, the next fix is a hard reset. This drains all the residual electrical charge sitting in your laptop’s motherboard, which can cause a black screen even when everything else seems fine.
Here’s what most people get wrong. They hold the power button for five or ten seconds, see the laptop turn off, and think they’re done. That’s not long enough. A proper hard reset on an HP laptop requires holding the power button for a full 15 to 30 seconds, even after the laptop appears to shut down.
Why? Because your motherboard holds onto what’s called flea power. It’s a small amount of electrical charge stored in the capacitors on the motherboard. That charge can confuse your laptop’s hardware and prevent the screen from turning on, even though the power light comes on and the fan spins. Draining the flea power clears that static buildup and forces the laptop to start fresh from a completely powered-down state.
And here’s something that trips people up. Most HP laptops sold in the last few years have sealed batteries. You can’t just pop the battery out like you could on older models. The hard reset method is different depending on which type you have.
For Modern HP Laptops (Sealed Battery Models)
If your HP laptop was made after 2022 or 2023, it almost certainly has a sealed battery. Here’s how to do a proper hard reset.
Step 1: Press and hold the power button until the laptop shuts down completely. Don’t just tap it. Hold it down for about five seconds until the power light goes off and the fan stops.
Step 2: Unplug the AC power adapter from your laptop. Disconnect it completely.
Step 3: Disconnect everything else. USB flash drives, external mice, HDMI cables, docking stations, and headphones. Everything. These can interfere with the reset process.
Step 4: Now press and hold the power button again for 15 to 30 seconds. Yes, the laptop is already off. Do it anyway. Count to 30 in your head. This is the step that actually drains the flea power from the motherboard.
Step 5: Plug only the AC power adapter back in. Leave everything else disconnected for now.
Step 6: Press the power button once to turn the laptop back on.
If the hard reset worked, your screen should come back when the laptop powers on. If you still see a black screen, leave the laptop running and move to the next troubleshooting step.
For Older HP Laptops (Removable Battery Models)
If your HP laptop has a removable battery, the process is slightly different but easier.
Step 1: Shut down the laptop completely. Hold the power button until it powers off.
Step 2: Flip the laptop over and slide the battery release latch to remove the battery. Set the battery aside.
Step 3: Unplug the AC power adapter.
Step 4: With the battery out and the adapter unplugged, press and hold the power button for 30 seconds. This drains the flea power.
Step 5: Reinsert the battery and plug the AC adapter back in.
Step 6: Press the power button to turn the laptop on.
Common Mistake: Releasing the Power Button Too Early
This is the reason hard resets fail for so many people.
You press and hold the power button. After five or ten seconds, the laptop shuts down. The power light goes off. The fan stops. Everything looks dead. So you let go of the button and assume you’re done.
But the capacitors on the motherboard are still holding a charge. You need to keep holding the power button for the full 15 to 30 seconds, even though the laptop already appears off. That’s what actually drains the flea power.
I’ve seen this mistake more times than I can count. Someone tries a hard reset, releases the button too early, and then tells me the fix didn’t work. They try again but hold it longer, and suddenly the screen comes back.
Count it out. Fifteen seconds minimum. Thirty is better if the black screen has been happening repeatedly or if the laptop was moved or bumped recently. Those few extra seconds make the difference.
Power Light On, But Screen Black? Here’s What It Means
When your HP laptop’s power light is on but the screen stays black, that’s actually good news.
It means your laptop is alive. The motherboard is receiving power. The processor is running. Windows might even be loaded in the background right now. The problem is isolated to the display output, not the entire system.
I see this scenario more than any other. The laptop turns on, the fan spins, and the keyboard lights up or the power light glows, but the screen shows absolutely nothing. No HP logo. No loading screen. Just black.
Here’s what that tells me. Your laptop’s internal hardware is working. If the power light is on and you hear the fan running, your HP laptop is processing normally, but the screen isn’t receiving the signal to display anything. The issue is somewhere in the display chain, which could be the graphics driver, the display cable connecting the screen to the motherboard, or the screen itself.
This is different from a laptop that won’t turn on at all. No lights, no fan, completely dead. That’s a power or motherboard problem. But when do you have lights and sounds? The laptop is running just fine. Something is just blocking the image from reaching your screen.
And that means you can test exactly where the problem is.
External Monitor Test: Is It the Screen or the Motherboard?
This is the single most useful diagnostic test you can do right now. Connect your HP laptop to an external monitor or TV and see if an image appears there.
Grab an HDMI cable. Most HP laptops have an HDMI port on the left or right side. Plug one end into your laptop and the other end into any TV or monitor you have around. Turn the external display on.
Now press the Windows key + P at the same time on your laptop’s keyboard. You can’t see your screen, but do it anyway. This opens the display projection menu in Windows.
Press the down arrow key once. Then press Enter. Wait five seconds. If nothing shows up on the external monitor, press the down arrow and Enter again. Do this three or four times, cycling through all the display modes.
What you’re looking for is whether anything appears on the external screen.
If the external monitor shows your Windows desktop, your laptop’s graphics card and motherboard are completely fine. The problem is with your laptop’s internal screen, the display cable that connects the screen to the motherboard, or the backlight that lights up the screen. The laptop itself isn’t broken. Just the display hardware.
If the external monitor also stays black and shows no signal, the issue is deeper. Could be the graphics driver is completely crashed, Windows isn’t loading, or there’s a motherboard problem. But at least now you know the laptop screen isn’t the issue.
This external monitor test takes two minutes and tells you whether you’re dealing with a simple screen replacement or something more complicated. I always run this test before doing anything else, because if an external display works, I know exactly where the problem is.
And if your external monitor shows your desktop right now, you can actually use your laptop with that external screen while you figure out whether to repair or replace the internal display. Not ideal, but it keeps you working while you decide what to do next.
Black Screen with Cursor? It’s Not What You Think
If you can see your mouse cursor moving around on a black screen, your display hardware is working perfectly.
This is not a broken screen. Not a failed graphics card. A black screen with a visible cursor means Windows Explorer has crashed. Windows Explorer is the part of Windows that shows your desktop, taskbar, start menu, and all your icons. When Windows Explorer stops working, everything disappears except the cursor.
And here’s what catches people off guard. The cursor proves your screen, your graphics card, and your entire display system are functioning normally. You’re looking at a software problem, not hardware.
I see this happen most often right after a Windows update. Windows 10 and Windows 11 both have a history of pushing updates that crash Windows Explorer on certain HP laptop models. One day your laptop works fine. The next day after an update, you log in and see nothing but a black screen with your cursor sitting there.
The good news? This display problem in Windows 10 and Windows 11 is fixable in under a minute without restarting your laptop or losing any work.
The 10-Second Task Manager Fix
Press Ctrl + Alt + Delete on your keyboard right now. Even though your screen looks black, Windows is running in the background, and this keyboard shortcut still works.
You should see a blue screen with several options. Click Task Manager at the bottom of that list. If you don’t see the blue screen, your cursor might have moved. Try the key combo again.
Once Task Manager opens, look at the top menu bar. Click File, then click Run new task.
A small window appears. Type explorer.exe into the box and press Enter.
Your desktop should come back immediately. All your icons, taskbar, and windows reappear like nothing happened. That’s because you just manually restarted Windows Explorer, which is all that crashed in the first place.
Sometimes Windows Explorer is already running but frozen. In that case, find Windows Explorer in the Task Manager process list. Right click on it and choose Restart. Same result.
This fix works about 80% of the time when you have a black screen with a cursor showing. But if your desktop doesn’t come back or if Windows Explorer keeps crashing every time you restart your laptop, the problem is likely a recent Windows update causing the crash.
If Explorer Restart Doesn’t Work: Uninstall Recent Windows Updates
When Windows updates cause this black screen issue, restarting Windows Explorer only fixes the problem temporarily. The desktop comes back, but the next time you restart your laptop, it shows a black screen with a cursor again.
The permanent fix is removing the Windows update that’s causing the crash. Here’s how to do that when your screen is mostly black.
First, you need to get into Windows recovery mode. Press Ctrl + Alt + Delete again and look for the power icon in the bottom right corner of that blue screen. Hold down the Shift key on your keyboard, then click Restart while still holding Shift.
Your laptop will restart and load into a blue Advanced Startup screen. If that doesn’t work and you just boot back into the black screen with a cursor, you’ll need to force it. Turn your laptop completely off by holding the power button. Turn it back on. As soon as you see the HP logo, hold the power button again to force it off. Do this three or four times in a row. Windows will eventually give up and load the Advanced Startup menu automatically.
Once you’re on that blue Advanced Startup screen, click Troubleshoot. Then click Advanced Options. Then click Uninstall Updates.
You’ll see two options. Uninstall the latest quality update and uninstall the latest feature update.
Start with the quality update. Click it, confirm the uninstall, and let Windows remove the update. This takes a few minutes. Then restart your laptop normally.
If the black screen with cursor is gone, you’re done. That quality update was the problem. If the black screen comes back, go through the same process again, but this time uninstall the latest feature update instead.
Windows 11 updates in late 2024 and early 2025 caused this exact issue repeatedly on HP laptops. Removing those updates fixed the problem for most people. And Windows will eventually release a fixed version of the update later, so you’re not stuck without updates forever.
HP BIOS Recovery for Black Screens at Boot
Most HP users have no idea their laptop has a built-in emergency recovery mode that can bring back a completely black screen at startup.
If your HP laptop shows the HP logo for a split second and then goes black, or if the screen stays completely black from the moment you press the power button, this BIOS recovery feature might be exactly what you need. HP laptops have a firmware-level recovery system you can trigger with a specific key combination, and it works even when the screen won’t turn on at all.
This isn’t something Windows does. This is deeper. BIOS sits below Windows and controls how your laptop’s hardware starts up before the operating system even loads. When the BIOS gets corrupted or confused, your laptop can get stuck at a black screen before Windows ever has a chance to run.
And here’s what throws people off. They see the HP logo appear for a second, which proves the laptop is alive, but then the screen goes black and stays black. Most people assume the motherboard is dead at that point. But usually? The BIOS just needs to reset itself to default settings, and HP built a way to do that without ever seeing your screen.
I’ve used this BIOS recovery method on HP laptops that looked completely dead. No display. Nothing on screen. Just a black screen from power-on. And after running the recovery, the laptop booted normally like nothing ever happened.
When to Use HP BIOS Recovery
Use this recovery method when the black screen happens before Windows loads. Not after you log in. Not after you see the Windows logo. Before all of that.
Here are the specific scenarios where HP BIOS recovery fixes the problem:
The HP logo appears briefly, then the screen goes black. You press the power button, see the HP logo for one or two seconds, and then the screen cuts to black and stays there. No Windows loading screen. Nothing. That’s a BIOS issue.
No display at all from power-on. You press the power button, the power light turns on, and you hear the fan spin, but the screen never shows anything. Not even the HP logo. Completely black from the start. BIOS recovery can fix this too.
The laptop won’t POST. POST stands for Power-On Self-Test. It’s what happens in the first few seconds when you turn on your laptop. If your HP laptop won’t turn on properly or gets stuck before showing any boot screen, the BIOS might be corrupted.
Black screen after a failed BIOS update. If you tried to update your BIOS and the update failed or got interrupted, your laptop can end up stuck at a black screen. BIOS recovery restores the firmware to a working state.
This recovery mode doesn’t help with black screens that happen after Windows starts loading. If you see the Windows logo and then the screen goes black, that’s a Windows problem, not a BIOS problem. Use the Windows fixes from earlier sections instead.
Step-by-Step BIOS Recovery Procedure
This key combination feels weird the first time you do it, but it works. You’re pressing three things in a specific order and holding them for exact amounts of time.
Step 1: Make sure your laptop is completely powered off. If it’s stuck at a black screen, hold the power button for 10 seconds to force it off.
Step 2: Press and hold the Windows key and the B key at the same time. Keep holding both keys down. Don’t let go yet.
Step 3: While still holding Windows and B, press and hold the power button for 2 to 3 seconds. Then release only the power button. Keep holding the Windows and B keys.
Step 4: Now listen. You should hear a series of beeps coming from your laptop. Two or three beeps in a pattern. That’s the laptop confirming it’s entering BIOS recovery mode. Once you hear the beeps, you can release the Windows and B keys.
Step 5: Wait. The screen might stay black for another 30 seconds to a minute. Then you’ll see the HP BIOS Update screen or a recovery screen appear. The laptop is running an automated BIOS restoration process. Don’t touch anything. Just let the process finish.
The entire recovery takes about two to three minutes. Your laptop will restart automatically when it’s done, and the BIOS boot screen should appear normally this time.
One mistake I see constantly. People do the key combo, don’t hear any beeps, and assume it didn’t work. But sometimes the beeps are quiet, or the laptop speaker isn’t loud. Wait the full two to three minutes even if you don’t hear anything. The recovery might still be running in the background.
BIOS Recovery vs. Windows Automatic Repair: Which to Use
If you’re not sure whether your black screen is a BIOS problem or a Windows problem, here’s how to tell.
Use BIOS recovery when the black screen happens before the Windows logo appears. If your laptop gets stuck at a black screen in the first few seconds after pressing the power button, before you see any Windows loading animation, that’s a boot-level issue. BIOS recovery is the right fix.
Use Windows Automatic Repair when the black screen happens after the Windows logo shows. If you see the Windows logo or loading circle and then the screen goes black, that’s a Windows-level issue. The BIOS loaded fine. Windows is what’s crashing. You need Windows recovery tools for that, not BIOS recovery.
BIOS recovery resets your laptop’s firmware to factory defaults. Windows Automatic Repair fixes corrupted Windows system files and boot configurations. They solve problems at different levels, so using the wrong one won’t help.
And if you’re still not sure which one you need? Try BIOS recovery first. It only takes three minutes, and it won’t hurt anything if it turns out the problem is Windows instead. The worst that happens is nothing changes, and you move on to Windows recovery next.
Safe Mode Driver Rollback for Windows Update Black Screens
Windows updates have a bad habit of breaking display drivers on HP laptops, and when that happens, you end up staring at a black screen every time you try to boot normally.
I’ve seen this pattern repeat over and over. Windows 11 pushes an update overnight. You restart your laptop the next morning. Black screen. The laptop boots, and you hear the startup sound, but the display stays dark because the new Windows driver installed is conflicting with your HP laptop’s graphics hardware.
Specific Windows 11 updates caused widespread black screen issues on HP laptops in 2024 and 2025. Update KB5063060 from June 2025 and update KB5046633 from November 2024 both triggered black screens on multiple HP models. If your black screen started right after a Windows update, there’s a good chance the update installed a broken display driver.
The fix is rolling back to the previous driver version that worked. But here’s the problem. You can’t roll back a driver while Windows is using that driver. Safe Mode loads Windows with only the most basic drivers, which lets you safely uninstall or roll back the display driver without Windows fighting you.
And when your screen is black, you can’t just click into Safe Mode the normal way. You need to force your laptop into recovery mode first.
Forced Interrupt Boot: How to Access Safe Mode with a Black Screen
This method tricks Windows into thinking something went wrong during startup, which makes Windows automatically load the Advanced Startup menu, where you can access Safe Mode.
Step 1: Make sure your laptop is on and showing the black screen. If it’s off, turn it on and let it get to the black screen.
Step 2: Press and hold the power button for about 10 seconds until the laptop shuts down completely. The power light will turn off and the fan will stop.
Step 3: Press the power button again to turn the laptop back on. Watch for the HP logo or the Windows logo to appear on screen.
Step 4: As soon as you see the HP or Windows logo, immediately press and hold the power button again to force the laptop off. You’re interrupting the boot process on purpose.
Step 5: Repeat this exact process three or four times. Power on, wait for the logo, and force shutdown. Power on, wait for the logo, and force shutdown. Keep doing this.
After the third or fourth forced shutdown, Windows gives up trying to boot normally. Instead of loading into the black screen again, you’ll see a blue screen that says “Preparing Automatic Repair” or “Diagnosing your PC.” That means it worked.
Wait for the Automatic Repair screen to fully load. You’ll see a screen with the heading “Automatic Repair” and a button that says “Advanced options.” Click that button.
Now you’re in the Advanced Startup menu. From here, click Troubleshoot, then click Advanced options, then click Startup Settings, then click Restart.
Your laptop restarts one more time and shows a blue screen with numbered options. Press 4 or F4 on your keyboard to select “Enable Safe Mode.” Your laptop will boot into Safe Mode, which looks like a low-resolution version of Windows with “Safe Mode” written in the corners of your screen.
And now you can actually fix the driver problem.
Rolling Back Display Drivers in Device Manager
Once you’re in Safe Mode, the screen is working because Windows loaded a generic basic driver instead of the problematic one.
Right-click the Start button and click Device Manager. If you can’t see the Start button, press the Windows key on your keyboard and type “device manager” and press Enter.
In Device Manager, look for Display adapters and click the arrow next to it to expand the list. You’ll see your graphics card listed there. It might say Intel, AMD, or NVIDIA depending on what your HP laptop uses.
Right-click on the display adapter and choose Properties. Click the Driver tab at the top.
Look for a button that says Roll Back Driver. If you see that button and it’s not greyed out, click it. This takes your display driver back to the previous version that was installed before the Windows update. Windows will ask you why you’re rolling back. Pick any reason and click Yes.
If the Roll Back Driver button is greyed out or missing, that means Windows doesn’t have a previous driver stored. In that case, click Uninstall Device instead. Check the box that says “Delete the driver software for this device” if you see it, then click Uninstall.
After the driver uninstalls, restart your laptop. Windows will automatically reinstall a basic driver when it boots, and that basic driver usually works better than the broken updated one.
If your black screen is gone after the restart, you’re done. The driver was the problem.
Driver Rollback vs. Reinstall: Which to Choose
Use Roll Back Driver when the black screen started immediately after a Windows update or after you manually updated your graphics driver. Rolling back returns you to the previous working driver version and is usually the safest option.
Use Uninstall Device when the Roll Back option isn’t available, or when the driver seems corrupted but you’re not sure if an update caused it. Uninstalling forces Windows to reinstall the driver from scratch, which can fix corruption issues.
If you uninstall the driver and the black screen comes back after Windows reinstalls it automatically, the problem might be that the latest driver version itself is broken for your HP laptop model. In that case, you’ll need to manually download an older driver version from HP’s support website and install that specific version instead.
And one more thing. After you successfully roll back or reinstall the driver, go into Windows Update settings and pause updates for at least a week. This prevents Windows from immediately reinstalling the same broken driver that caused the black screen in the first place. Give it time for Microsoft or HP to release a fixed version.
Clean and Reseat Your RAM (The Overlooked Hardware Fix)
Loose or dirty RAM is one of the most common hardware causes of black screens on HP laptops, and almost nobody thinks to check it.
RAM sits in a slot on your motherboard. Over time, the gold contacts on the RAM stick can develop a thin layer of oxidation or collect dust. That layer blocks the electrical connection between the RAM and the motherboard. When RAM can’t make proper contact, your laptop won’t POST (Power-On Self-Test), and you’ll get a black screen with no display at all, even though the power light turns on and the fan spins.
I’ve fixed more black screens by simply removing the RAM, cleaning the contacts, and putting it back in than most people would expect. It’s a five-minute DIY repair that costs nothing and works surprisingly often.
And here’s what makes this fix even better. You don’t need special tools or technical skills. A pencil eraser and a can of compressed air are enough to clean RAM properly.
When to Suspect RAM Issues
Not every black screen is caused by RAM, but certain symptoms point to RAM as the likely problem.
You hear beep codes when you try to turn on the laptop. Most HP laptops emit a series of beeps when RAM isn’t detected or isn’t making contact. Usually two or three beeps in a pattern. If you hear beeping and see a black screen, check the RAM first.
Black screen with absolutely no POST. The screen stays completely black from the moment you press the power button. No HP logo. No BIOS screen. Nothing. The laptop powers on, the fan runs, and the power light glows, but the screen never shows anything. That’s a classic RAM contact issue.
The laptop was recently moved, bumped, or dropped. Physical movement can jostle RAM loose in its slot just enough to break contact. If your black screen started right after moving your laptop or after it got knocked around in a bag, RAM is the first thing I check.
Intermittent black screens that come and go. Sometimes the laptop boots fine. Other times, a black screen. The inconsistency suggests a loose connection rather than a completely failed component. RAM that’s partially unseated causes exactly this pattern.
If any of these match what you’re seeing, it’s worth opening up the laptop and checking the RAM.
Safe RAM Removal and Cleaning Steps
This is not complicated, but you do need to be careful with a few things. Static electricity can damage RAM and motherboard components, and the RAM clips are easy to break if you force them.
Step 1: Shut down your laptop completely. Not sleep mode. Full shutdown. Unplug the power adapter.
Step 2: Flip the laptop over and look for the removable panel on the bottom. Most HP laptops have a small rectangular panel held on by two or three small screws. Some models have the entire bottom cover removable. Check your specific HP model if you’re not sure which panel covers the RAM.
Step 3: Remove the screws and gently lift off the panel. Set the screws somewhere safe where they won’t roll away.
Step 4: Before touching anything inside, touch a metal part of the laptop’s frame to discharge any static electricity from your body. This grounds you and prevents static from damaging components.
Step 5: Locate the RAM. It looks like a small green or black rectangular board with chips on it, sitting at an angle in a slot. Most HP laptops have one or two RAM sticks.
Step 6: Look at the sides of the RAM stick. You’ll see two small metal clips holding the RAM in place. Gently push those clips outward at the same time. The RAM will pop up at an angle. Pull it straight out at that same angle.
Step 7: Now clean the gold contacts on the bottom edge of the RAM stick. Grab a regular pencil eraser, the kind you use on paper. Gently rub the eraser along the gold contacts in one direction. You’ll see the contacts brighten up as the oxidation comes off. Do this for about 10 seconds on each side if the RAM has contacts on both edges.
If you have isopropyl alcohol (90% or higher), you can use that instead. Dab a bit on a clean cloth and wipe the contacts. Let the RAM dry for 30 seconds before reinstalling it.
Step 8: Clean the RAM slot. Use compressed air to blow any dust out of the slot where the RAM sits. Dust in the slot causes the same contact problems as dirty RAM.
Step 9: Reinsert the RAM. Line up the notch in the RAM stick with the notch in the slot. Insert the RAM at the same angle you removed it, usually about 30 degrees. Press down firmly on both ends of the RAM until it clicks flat and the side clips snap into place automatically. You should feel and hear the click.
Step 10: Put the panel back on, replace the screws, flip the laptop over, plug in the power, and turn it on.
If RAM contact was the problem, your screen should come back immediately when you boot up. The HP logo appears, the BIOS loads, and Windows starts normally.
And if you have two RAM sticks and the black screen persists after cleaning both, try removing one stick and booting with just one installed. Then swap them and try the other stick alone. Sometimes one stick is actually bad, and this test tells you which one.
What Blinking Power Lights Mean (HP LED Diagnostic Codes)
Your HP laptop is trying to tell you exactly what’s wrong, but you’re probably not listening.
When an HP laptop won’t turn on properly or shows a black screen, the power light, Caps Lock light, or Num Lock light often blinks in a specific pattern. Those blinking lights are diagnostic codes that tell you which hardware component is failing. Most people just see blinking lights and assume the laptop is broken. They don’t realize the blinks are a message.
HP built this diagnostic system into their laptops so you can identify hardware failures without even seeing the screen. The laptop counts out the problem using LED blinks. Two blinks means one thing. Three blinks means something else. Five blinks means something different. Each pattern points to a specific component.
And almost nobody knows this exists.
I’ve watched people stare at a blinking Caps Lock light for ten minutes, convinced their laptop is dead, when the blink pattern was literally telling them, “Your RAM isn’t seated properly,” the entire time. Counting the blinks and looking up what they mean takes two minutes and often tells you exactly what needs fixing.
The exact meaning of each blink pattern varies depending on your HP laptop model, so checking HP’s official diagnostic resources is essential for accurate troubleshooting. HP maintains a comprehensive support database where you can enter your specific model number and access official LED blink code charts, BIOS updates, and known issue bulletins at support.hp.com. Their automated diagnostic tools can also run remote tests on your laptop to identify hardware failures that cause black screen issues. This official resource is updated regularly with new diagnostic codes and model-specific fixes that aren’t available in generic troubleshooting guides, making it particularly valuable when standard fixes don’t resolve your black screen problem.
Common HP LED Blink Patterns
The exact meaning of each blink pattern varies depending on your HP laptop model, so you’ll need to look up your specific model’s codes on HP’s support site. But here are the general patterns that appear across most HP laptops as examples of what the codes indicate.
Two blinks, pause, repeat. This usually indicates BIOS corruption or a BIOS communication failure. The laptop’s firmware can’t load properly. BIOS recovery (the Windows + B + Power method from earlier) often fixes this.
Three blinks, pause, repeat. RAM failure or RAM not detected. Either the RAM isn’t making contact, the RAM slot is bad, or the RAM stick itself has failed. Reseating or cleaning the RAM usually fixes this if the RAM isn’t actually dead.
Four blinks, pause, repeat. Graphics card or graphics hardware failure on some models. On others, it’s a power supply issue. Check your specific model’s code chart.
Five blinks, pause, repeat. Motherboard or CPU failure. This is the serious one. If you see five blinks, your laptop likely needs professional repair or motherboard replacement.
Continuous blinking with no pattern. Thermal shutdown. The laptop is overheating and shutting itself down to prevent damage. Usually means blocked vents, a dead fan, or dried-out thermal paste on the processor.
These are general examples. Your HP model might use different codes. The blink count matters, so watch the power light or Caps Lock light carefully and count how many times it blinks before it pauses and repeats.
To find the exact codes for your laptop, search “HP [your model number] LED blink codes” or go to HP’s support site and enter your model. HP publishes official code charts for most models. The chart tells you exactly what each pattern means for your specific laptop.
And here’s why this matters. If you’re seeing three blinks and you know that means RAM, you can reseat the RAM yourself in five minutes instead of paying a repair shop to diagnose the same problem. If you’re seeing five blinks and you know that means motherboard failure, you can skip all the troubleshooting and start looking at replacement or professional repair options immediately.
The laptop is giving you free diagnostic information. You just have to count the blinks and look up what they mean.
HP Model-Specific Known Black Screen Issues (2024-2025)
Sometimes the black screen on your HP laptop isn’t something you can fix at home, because it’s a manufacturing defect HP already knows about.
Before you spend hours troubleshooting or pay for a repair, check if your specific HP model has a documented hardware issue. Several HP laptop models released in 2023 through 2025 have known black screen defects that HP has acknowledged, and in some cases, there are official firmware updates or warranty replacements available.
This is the part most troubleshooting guides skip completely. They give you generic fixes and assume every black screen is the same. But if your HP Victus 16 gaming laptop goes black during intense gameplay, or if your OMEN 9 has been showing black screens since you bought it, those aren’t random problems you caused. Those are documented quality issues affecting thousands of HP laptop owners.
Here’s what I’ve found about HP laptop screen issues on specific models in the last two years.
HP Victus 16 Hall Sensor Defect (2025)
If you own an HP Victus 16 gaming laptop from the 16-r or 16-s series and the screen goes black specifically during gaming sessions, you’re dealing with a hardware design flaw, not a software problem.
The HP Victus 16 has a Hall sensor that detects when the laptop lid is closed. This sensor tells the laptop to turn off the display and enter sleep mode when you close the lid. But HP placed this Hall sensor too close to the heatpipe inside the Victus 16. When the laptop heats up during gaming, the heat affects the sensor and triggers false “lid closed” signals even though the lid is wide open.
The laptop thinks you just closed the lid, so the screen goes black. Then a few seconds later, the sensor resets and the screen comes back. Or it stays black, and you have to restart the laptop.
This defect became widely reported in 2025, and there’s even legal action against HP in France over it. If you have a Victus 16 and experience black screens only during gaming or only when the laptop is hot, this Hall sensor issue is almost certainly the cause.
The bad news? This isn’t fixable with driver updates or BIOS recovery. It’s a physical hardware placement problem. The good news? If your Victus 16 is still under warranty, HP may replace the affected components or replace the laptop entirely. Contact HP support, describe the gaming black screen issue, and ask specifically about the Hall sensor defect. Many users have gotten warranty replacements after mentioning this known problem.
HP OMEN 9 Black Screen Controversy (2024)
The HP OMEN 9 had one of the largest documented black screen quality issues I’ve seen on any laptop model.
Thousands of HP OMEN 9 owners, particularly in China, reported identical black screen problems starting in 2023 and continuing into 2024. Over 10,000 users joined complaint groups documenting the same HP laptop display issue on OMEN 9 models purchased between late 2023 and early 2024. The screens would go black randomly, sometimes within weeks of purchase, and standard troubleshooting didn’t fix the problem.
HP eventually acknowledged the issue and offered free repairs for some affected units. But here’s where it got messy. HP’s repair policy was inconsistent. Some OMEN 9 owners got full replacements. Others got repairs. And some were denied coverage entirely based on their purchase date, even though their laptops had the exact same defect.
If you own an HP OMEN 9 from 2023 or 2024 and you’re experiencing black screens, search HP’s support forums for OMEN 9 black screen service bulletins specific to your region. Document when you bought the laptop and when the black screens started. HP has been more responsive to OMEN 9 owners who can show the issue appeared within the first year of ownership.
This isn’t a fix-it-yourself situation. The OMEN 9 black screen issue appears to be a hardware defect at the manufacturing level, and HP’s official repair program is your best option.
HP Pavilion Plus 14 Firmware Fix (July 2024)
This one actually has a happy ending. If you own an HP Pavilion Plus 14-ey0000 model and see flickering or intermittent black screens, HP released a display panel firmware update in July 2024 that fixes the problem.
The HP Pavilion Plus 14 had a firmware bug in the display panel itself. Not Windows. Not the graphics driver. The actual LCD panel’s firmware. This caused the screen to flicker, go black for a few seconds, and come back randomly. Sometimes multiple times a day.
HP identified the issue and pushed out a firmware update specifically for the display panel. If you have an HP laptop screen flickering on a Pavilion Plus 14-ey0000, go to HP’s support website, enter your model number, and look for the display panel firmware update dated July 2024 or later. Download and install that update before trying any of the manual troubleshooting steps in this guide.
The firmware update takes about five minutes to install and requires a restart. After that, the flickering and black screen issues should stop completely.
And if you already tried all the troubleshooting steps in this article and nothing worked, check for this firmware update. I’ve seen Pavilion Plus 14 owners spend days trying driver fixes and BIOS recovery when the actual solution was a single firmware update HP released months ago.
When to DIY vs. When to Pay for Repair (Cost Breakdown)
The decision comes down to money and confidence. DIY screen replacement typically costs $50 to $100 for parts alone, while professional repair runs $135 to $300 depending on your HP model.
I see people make this choice wrong all the time. They either panic and pay way too much for a simple fix, or they dive into a DIY job that destroys their laptop completely.
The math is straightforward. Professional repair costs about double what DIY costs, sometimes triple. But that extra money buys you warranty protection and someone else taking responsibility when things go sideways.
DIY Screen Replacement Cost and Difficulty
Parts cost between $50 and $100 for most HP laptop screens. That price jumps fast if you have a touch screen or OLED display.
Here’s what makes DIY repair harder than it looks. You need to disconnect the video cable without damaging the ribbon cable connector. The laptop bezel removal requires prying off plastic clips that snap easily. LCD panel screws are tiny and strip if you use the wrong screwdriver.
Touch screens add another layer of complexity. The replacement screen adhesive has to seal perfectly, or you get dust inside the display. Most people mess this up on their first try.
I always tell people to check their exact model number before ordering parts. Buying the wrong replacement screen is expensive. HP uses different LCD panels even within the same laptop series, and they are not interchangeable.
The tools you need cost another $15 to $25. Plastic prying tools, precision screwdrivers, and anti-static protection. You can skip some of this, but you increase your chances of breaking something else.
Professional Repair Cost and Turnaround
Professional HP laptop screen replacement costs range from $135 for basic models up to $300 for premium touch screen or OLED displays.
Most repair shops can finish the job same-day if they have your screen in stock. Otherwise, expect 2 to 3 days for parts to arrive. The big advantage is warranty protection on the work.
Your existing warranty stays intact with professional repair. DIY work voids any remaining manufacturer coverage immediately. That matters more on newer laptops than older ones.
Local repair shops usually beat manufacturer pricing by $50 to $100. But manufacturer repair gives you genuine HP parts and longer warranty coverage on the replacement screen.
When to Replace the Laptop Instead of Repairing
Simple rule. If screen replacement costs more than 50% of what your laptop is worth, buy a new one instead.
A $200 repair makes sense on a laptop worth $400 or more. But spending $200 to fix a laptop worth $300 is throwing money away. You could put that $200 toward something newer and better.
Check what your exact model sells for used before deciding. HP laptop values drop fast, especially on models more than 3 years old. Sometimes the repair cost exceeds the replacement cost completely.
Age matters too. Repairing a 5-year-old laptop means other parts will start failing soon. The battery probably needs replacement. The hard drive might be next. One repair often leads to another within 6 months.
Frequently Asked Questions
Does a hard reset delete my files or settings on an HP laptop?
No. A hard reset only drains leftover electricity from your laptop’s motherboard and does not touch your files, programs, or Windows settings at all. People confuse this with a factory reset, but a hard reset just clears electrical glitches while keeping everything intact. It is the safest first step when you need to fix an HP laptop black screen issue.
Why does my HP laptop screen go black after I enter my password?
This happens when Windows Explorer crashes right after login, but your laptop is running fine with the desktop interface disappearing. Press Ctrl+Alt+Delete, open Task Manager, find Windows Explorer under Processes, and click Restart to bring your desktop back. If that fails, boot into Safe Mode and uninstall recent Windows updates that likely caused the problem.
Can a Windows 11 update cause a black screen on HP laptops?
Yes, specific Windows 11 updates in 2024 and 2025 caused widespread black screen problems on HP laptops. The worst offenders were KB5063060 from June 2025 and KB5046633 from November 2024, with HP graphics driver compatibility issues. Boot into Safe Mode, go to Windows Update history, and uninstall the most recent Quality or Feature update to fix it.
What does it mean if my HP laptop power button is blinking but the screen is black?
Blinking power lights are HP’s diagnostic codes that point to specific hardware problems based on the number of blinks in each sequence. Count the blinks and look up your exact HP model’s LED code chart on HP’s support website for interpretation. Common patterns include 3 blinks for RAM problems and 5 blinks for motherboard issues.
Will the Windows + Ctrl + Shift + B shortcut work if my HP laptop screen is completely black?
Yes, if your laptop is still running in the background with fans spinning or a solid power light indicating Windows is loaded. Press all four keys simultaneously for 2 seconds and listen for a beep or brief screen flash that restarts your graphics driver. If nothing happens after 10 seconds, move on to the hard reset method instead.
What is the fastest way to learn how to fix a HP laptop black screen problem?
Start with the hard reset method by unplugging everything and holding the power button for 30 seconds, which fixes about 60% of black screen cases immediately. If that fails, try the Windows + Ctrl + Shift + B graphics driver reset, then connect an external monitor to determine if it’s a hardware or software issue. Learning how to fix an HP laptop black screen comes down to following this systematic approach rather than guessing at random solutions.
Conclusion
Learning how to fix an HP laptop black screen comes down to following the right sequence. Not guessing randomly.
Start with the hard reset every time. Unplug everything, hold the power button for 30 seconds, then reconnect and test. This fixes most black screen problems within 2 minutes.
If that fails, try the Windows + Ctrl + Shift + B graphics reset. Then connect an external monitor to see if your display hardware is broken or if Windows is the problem.
Most people jump straight to complicated solutions or panic about expensive repairs. The systematic approach works better. I have seen too many laptops get worse because someone skipped the simple steps and went straight to driver reinstallation or hardware replacement.
The external monitor test saves you the most time and money. Know whether you have a $50 software fix or a $200 hardware problem before you start taking things apart.
Keep your expectations realistic too. If your laptop is 4+ years old and the screen replacement costs more than half what the laptop is worth, put that money toward a new one instead.
But try the hard reset first. You will be surprised how often that boring old trick actually works.
4 comments